How to Create Custom Animations in PowerPoint


Getting learners to absorb (and remember) dry or complex topics is no small feat. And triggered animation is one tool that can help you.
With animations, you can tell a story through motion, guide learners’ focus from element to element, or even make a static slide feel more video-like.
In this article, I’ll walk you through two ways to add advanced animations in PowerPoint:
- Using a PowerPoint-based tool with templates specifically designed for eLearning. Perfect for most training use cases and super quick to build.
- Using PowerPoint’s built-in features. Ideal when you want full control and need to bring a unique animation to life.
What Is Custom Animation in PowerPoint?
Custom animation in PowerPoint refers to any animation that you manually configure, beyond just selecting from the four default categories: entrance, emphasis, motion paths, or exit effects.
Choose from the two methods:
An Add-In with PowerPoint Animation Templates
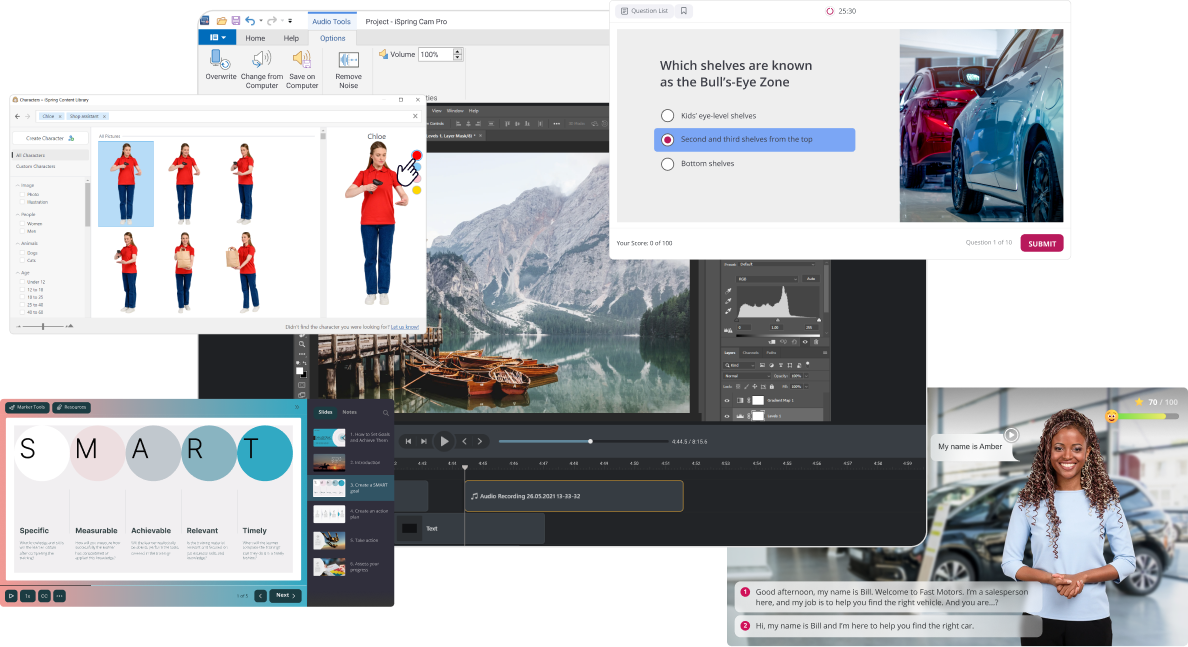
iSpring Suite is a PowerPoint-based authoring tool that offers multiple templates for interactions, game-like quizzes, and role-play simulations. They look and behave like advanced animation work, but creating them feels more like filling out a form.
14 interaction templates
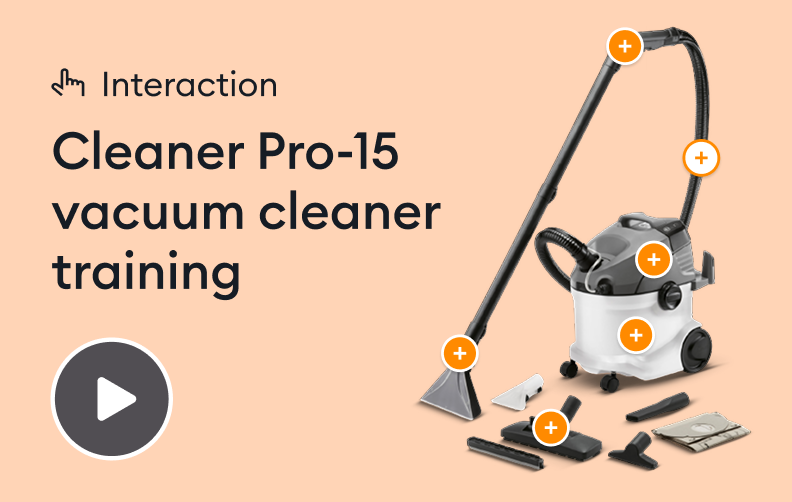
iSpring Suite has 14 pre-made interactions — accordion, timeline, tabs, hotspot, etc. Just select one of the templates, add text and multimedia, change labels, color, font, and background, and then publish.
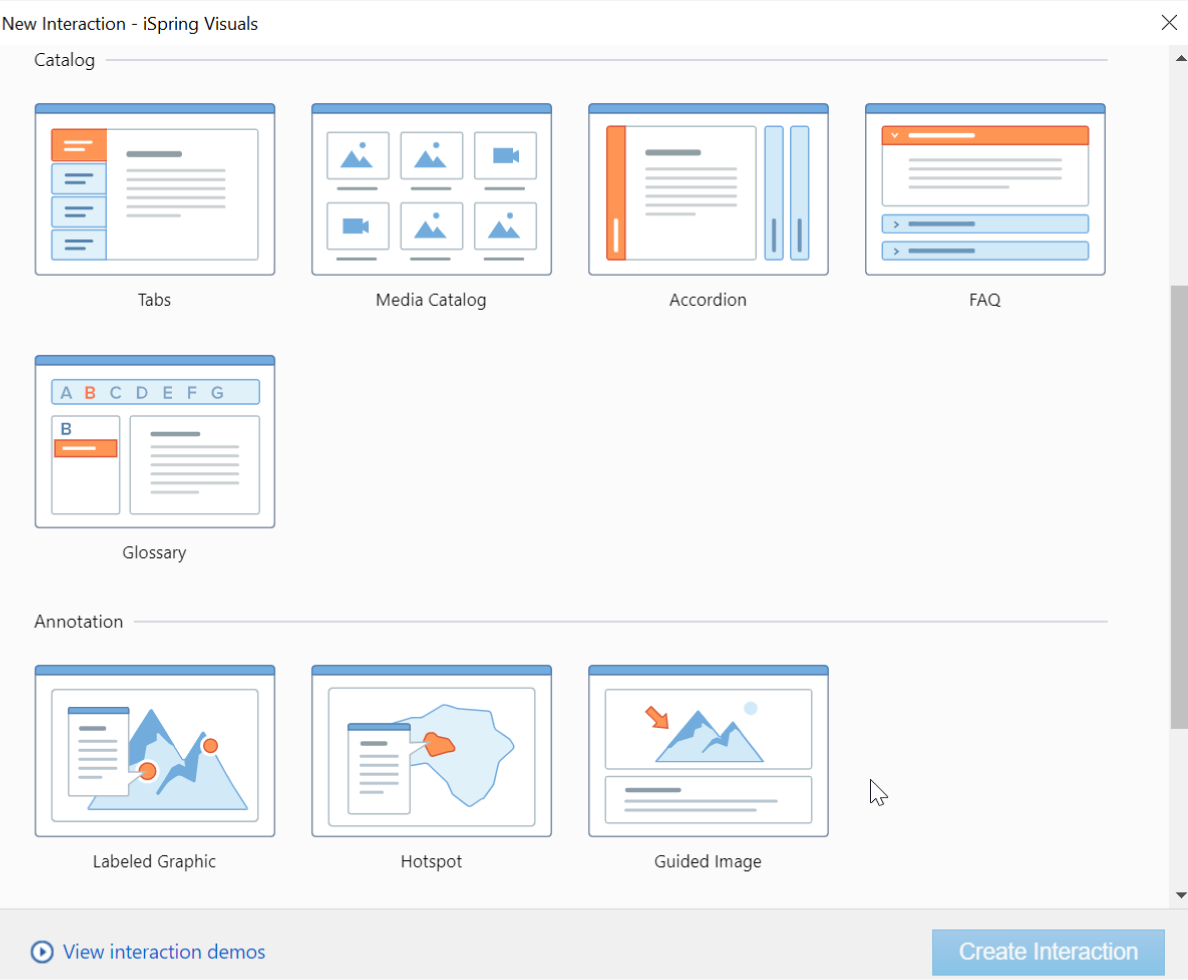
Check the Labeled Graphic interaction in action:
14 quiz templates
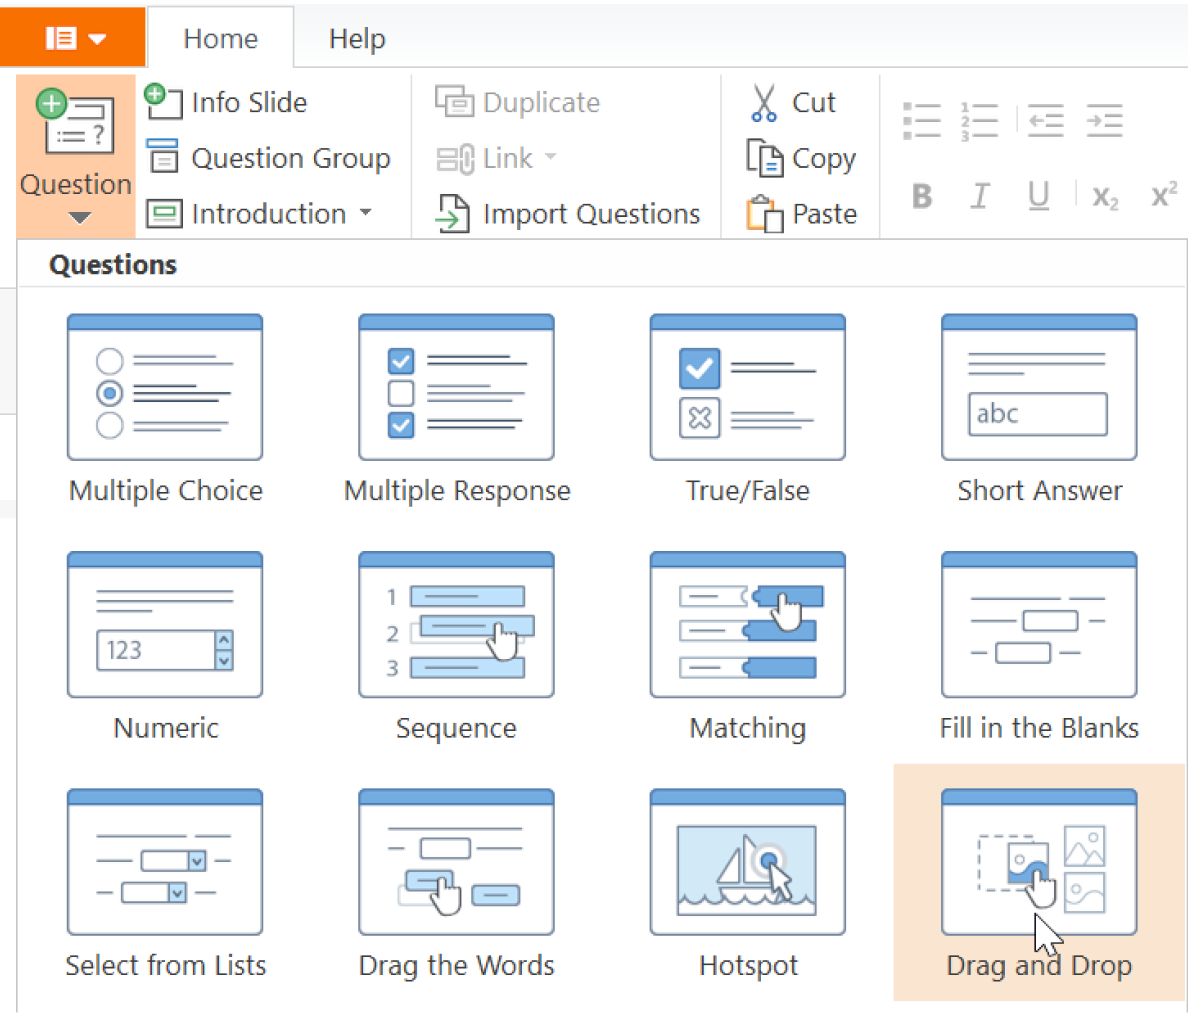
iSpring Suite also helps you add gamification to your PowerPoint presentation with 14 quiz templates, including drag-and-drop, sequence, matching, hotspot, and Likert scale.
Role-play simulations
Besides interactions and quizzes, you can also easily build role-play simulations with iSpring Suite. It uses a visual drag-and-drop interface that makes connecting scenes intuitive and shows the full conversation flow at a glance. You can customize each scene with characters, backgrounds, and voice-overs.
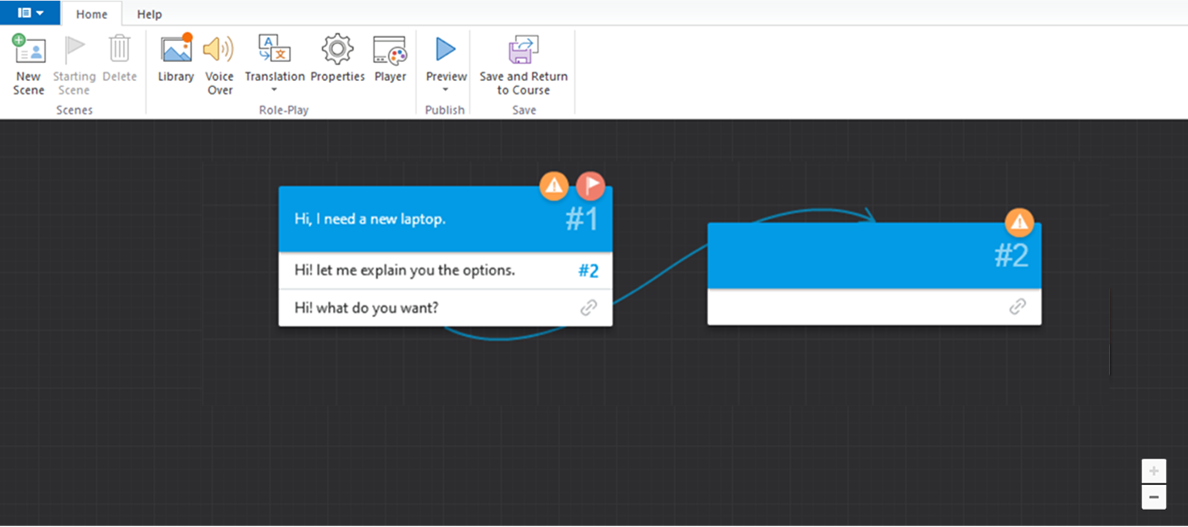
See the role-play simulation in action:

What else does iSpring Suite offer?
The abovementioned drag-and-drop tools for advanced PowerPoint animations are only a small portion of the ways you can enhance your course with iSpring Suite. It has a full package of features that can turn a basic PowerPoint presentation into an interactive course ready to publish to your LMS:
- A content library with 127,000+ editable course templates, characters, backgrounds, and images
- Audio or video editors
- A text-to-speech feature for making realistic voice-overs in 53 languages
- Effortless publishing to iSpring Cloud AI or any LMS in SCORM or other standards like xAPI, cmi5, and AICC
By having all the necessary tools to make your branded presentation engaging and effective right in PowerPoint, you’ll save hours of work. For example, one of iSpring Suite’s customers, Safety Bee Training, reduced their course-building time by two-thirds (and received positive feedback from learners).
If you want to make your content more memorable without spending days on a single module, download iSpring Suite. For anyone who needs to complete a one-off task, don’t worry because the tool offers a 14-day free trial.

How to Create Your Own Animations in PowerPoint
If iSpring Suite’s animation templates don’t quite achieve the effect you have in mind, you can use advanced animation techniques with PowerPoint’s built-in animation settings to bring the new animation idea to life. The approach I’ll explore here will cover most of your needs. The approach I’ll explore here will cover most of your needs.
Download this sample PPT to see custom animation examples in action and try out the settings as you follow the guide.
Too much to read? Get a summary from AI
Apply multiple PowerPoint animations to an object
To apply more than one animation to your text or image, you’ll need a toolbar called Animation Pane that lets you:
- Lists all animations.
- Reorder animation effects.
- Adjust start, delay, and duration.
- Preview animation.
Use the advanced timeline to sync animations with the audio.
- To find the Animation Pane, switch to the Animations tab and click on the respective button.

Tip: You can also turn on the Selection Pane to give distinct names to objects on a slide (Home → Select → Selection Pane).
- Select an object on the slide.
- Click on the Add Animation button or select an animation from the sample gallery on the left-hand side. It will animate the text or image.
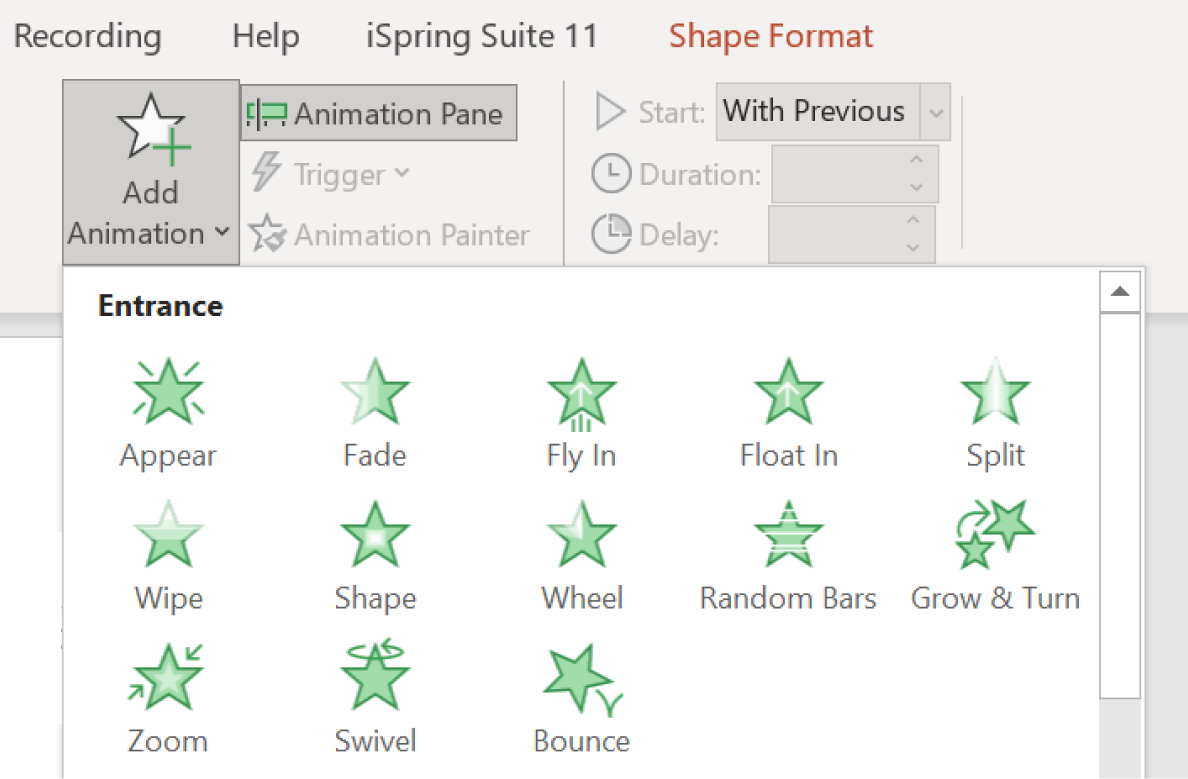
To apply additional animation effects, click on the same Add Animation button again. Note that this option lets you apply more than one animation per object. If you use other methods, the prior effect will be replaced.
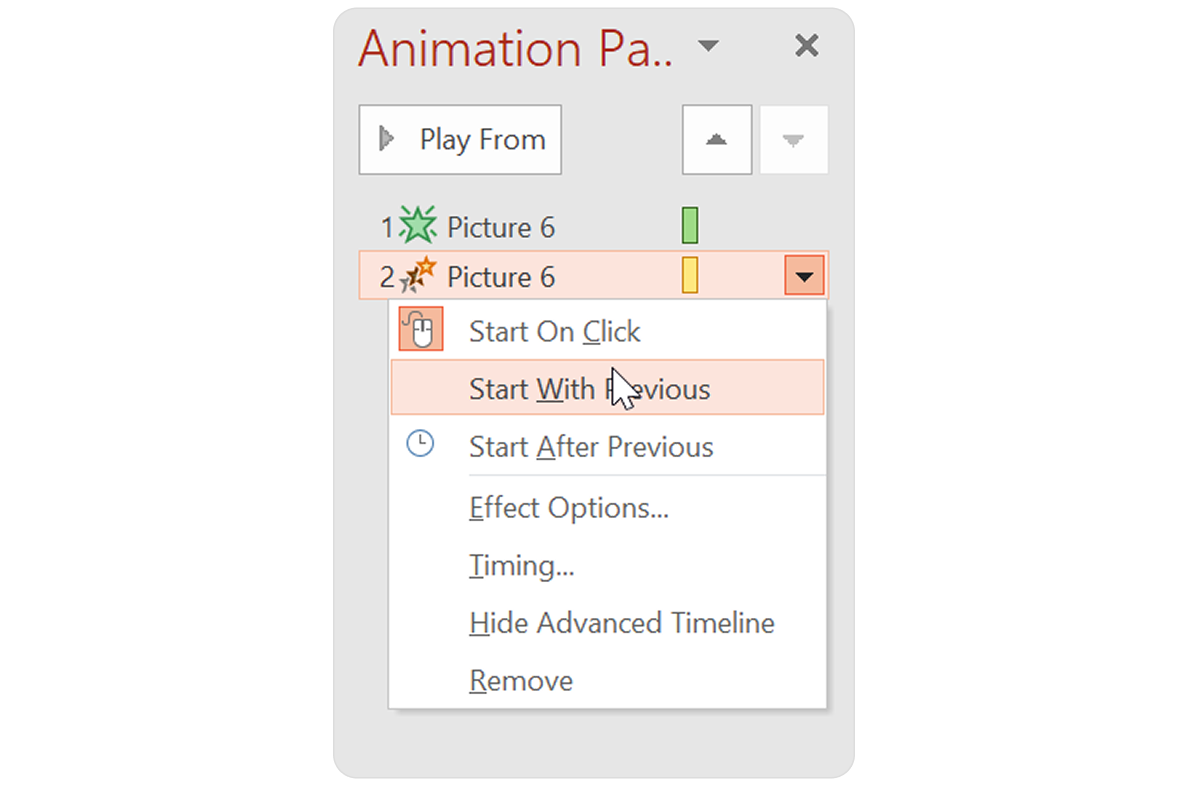
- Go to the Animation Pane on the left, right-click on a second effect, and choose Start With Previous so both animations play together. If you select Start After Previous, animation effects will be set in sequence.
Cool — we’ve created a combo animation!
When you click on the object on your current slide, all of its animation effects will be automatically selected in the Animation Pane, and the Animation gallery will indicate Multiple.
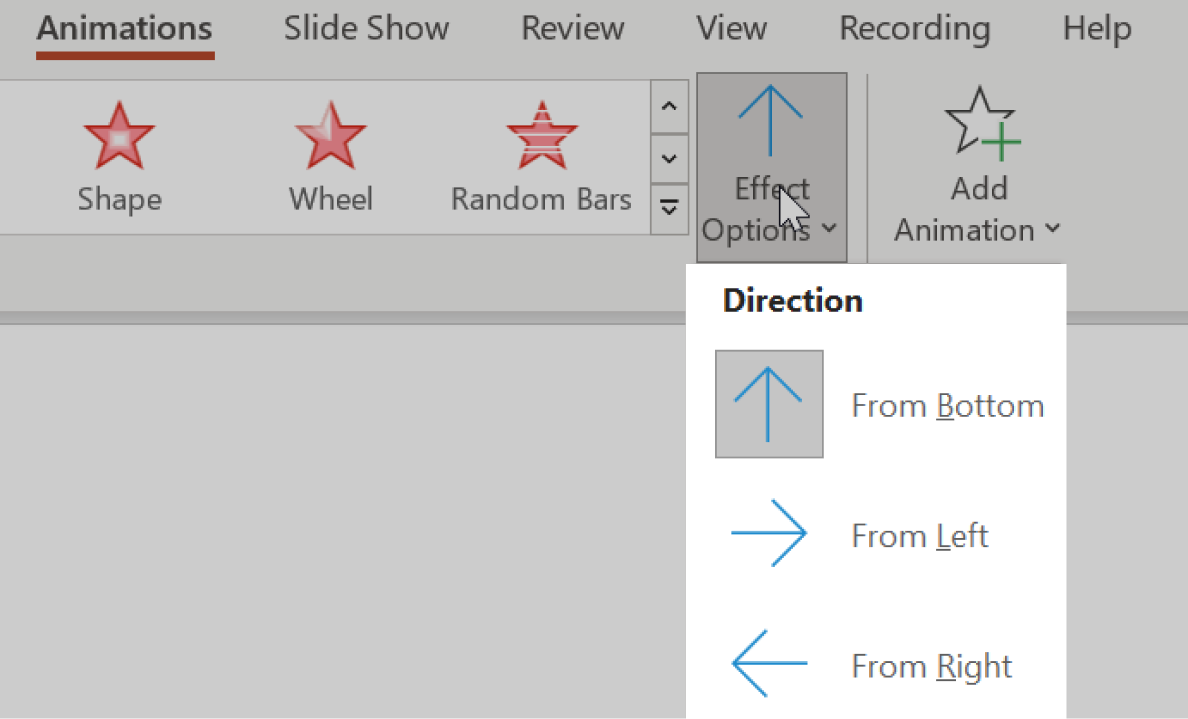
- Now you can select the effect options available for many animations. For example, you can modify the direction of the Fly In effect. To do that, select an animation and click on the Effect Options drop-down menu that’s on the Animations tab.
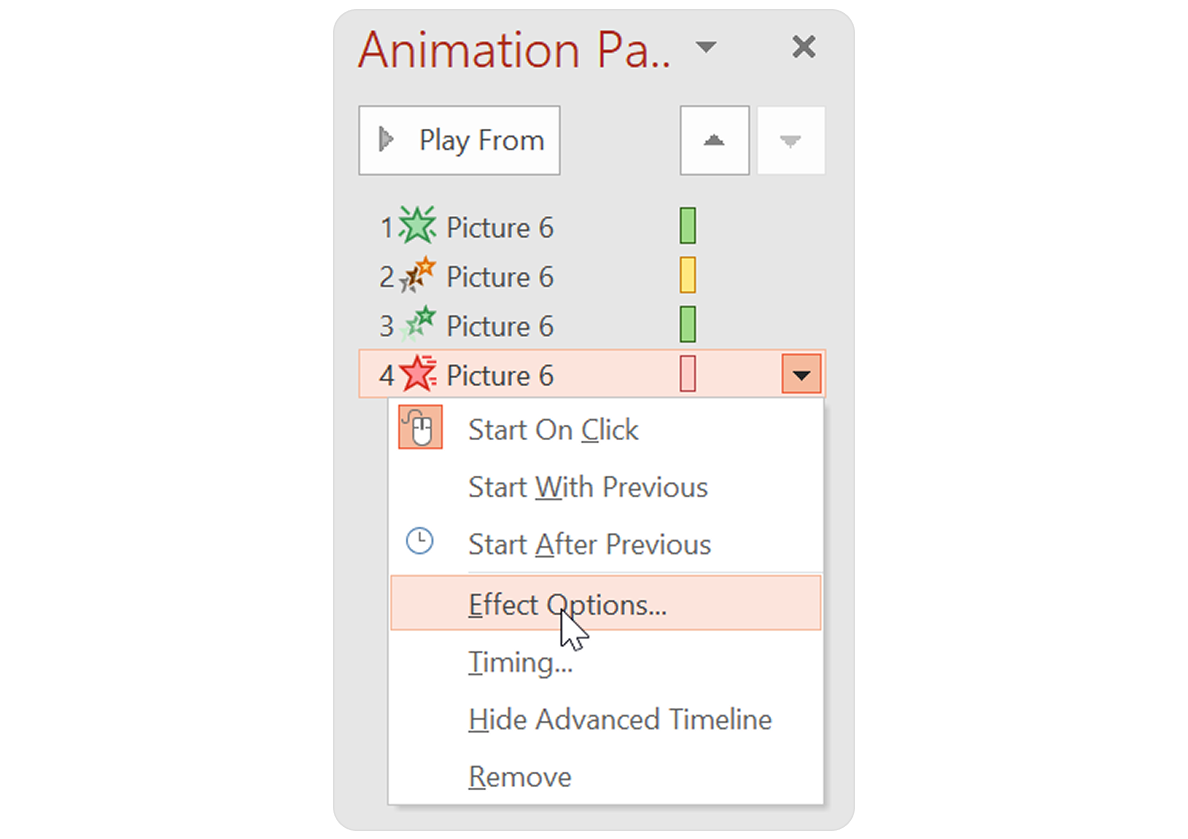
For more in-depth settings, right-click on a specific effect from the list in the Animation Pane and select Effect Options from the drop-down menu. It will open a pop-up window with the effect settings.
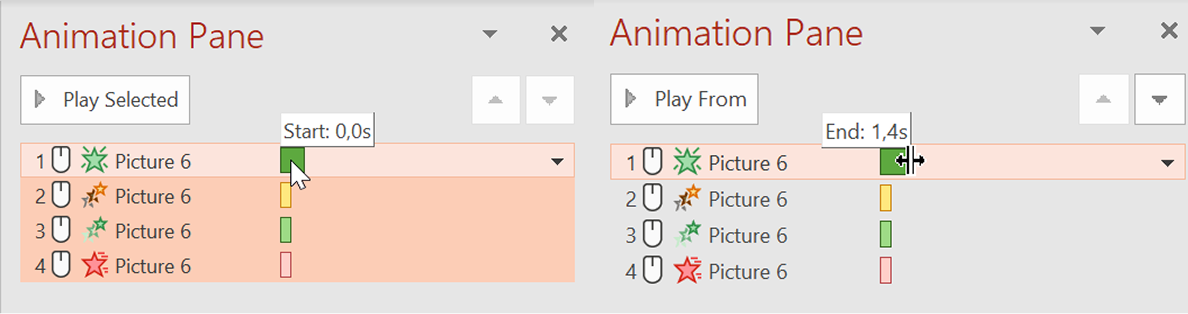
- Manage animations’ timings right in the Animation Pane. When you click and drag the green timeline for the effect, you can configure the start time for the chosen animation. If you click on the border of the timeline and drag it, you’ll modify the duration of that animation.
You can also use numeric input by right-clicking on the animation and selecting Timing.
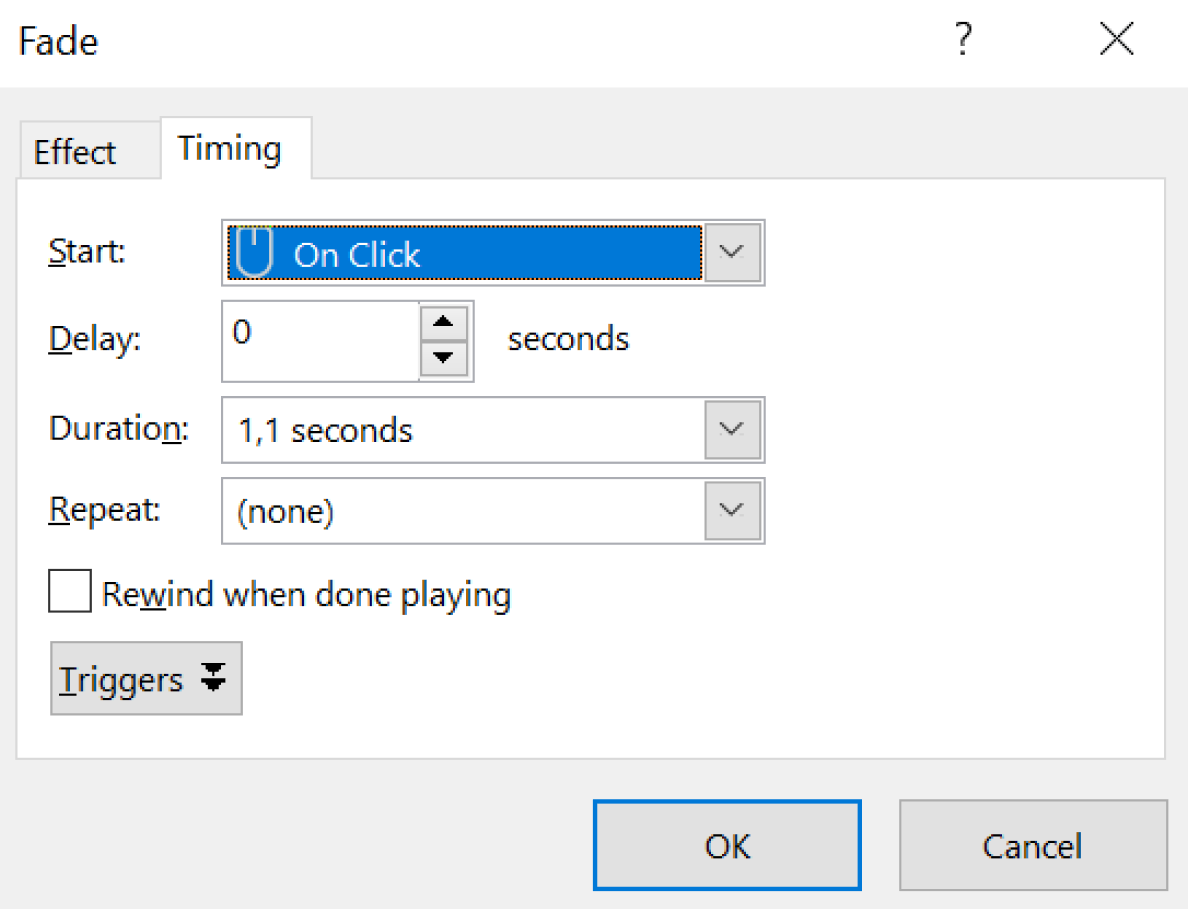
If you want the effect to repeat, e.g., an object pulsing as it moves, you can set a custom number of repeats within the same window.
Create a custom motion path
Motion path is a type of animation. But unlike simple fades or emphasis animation effects, motion paths move objects spatially: from point A to B, or along curves and custom trajectories.
To add your custom motion path, follow these steps:
Step 1. Select an object.
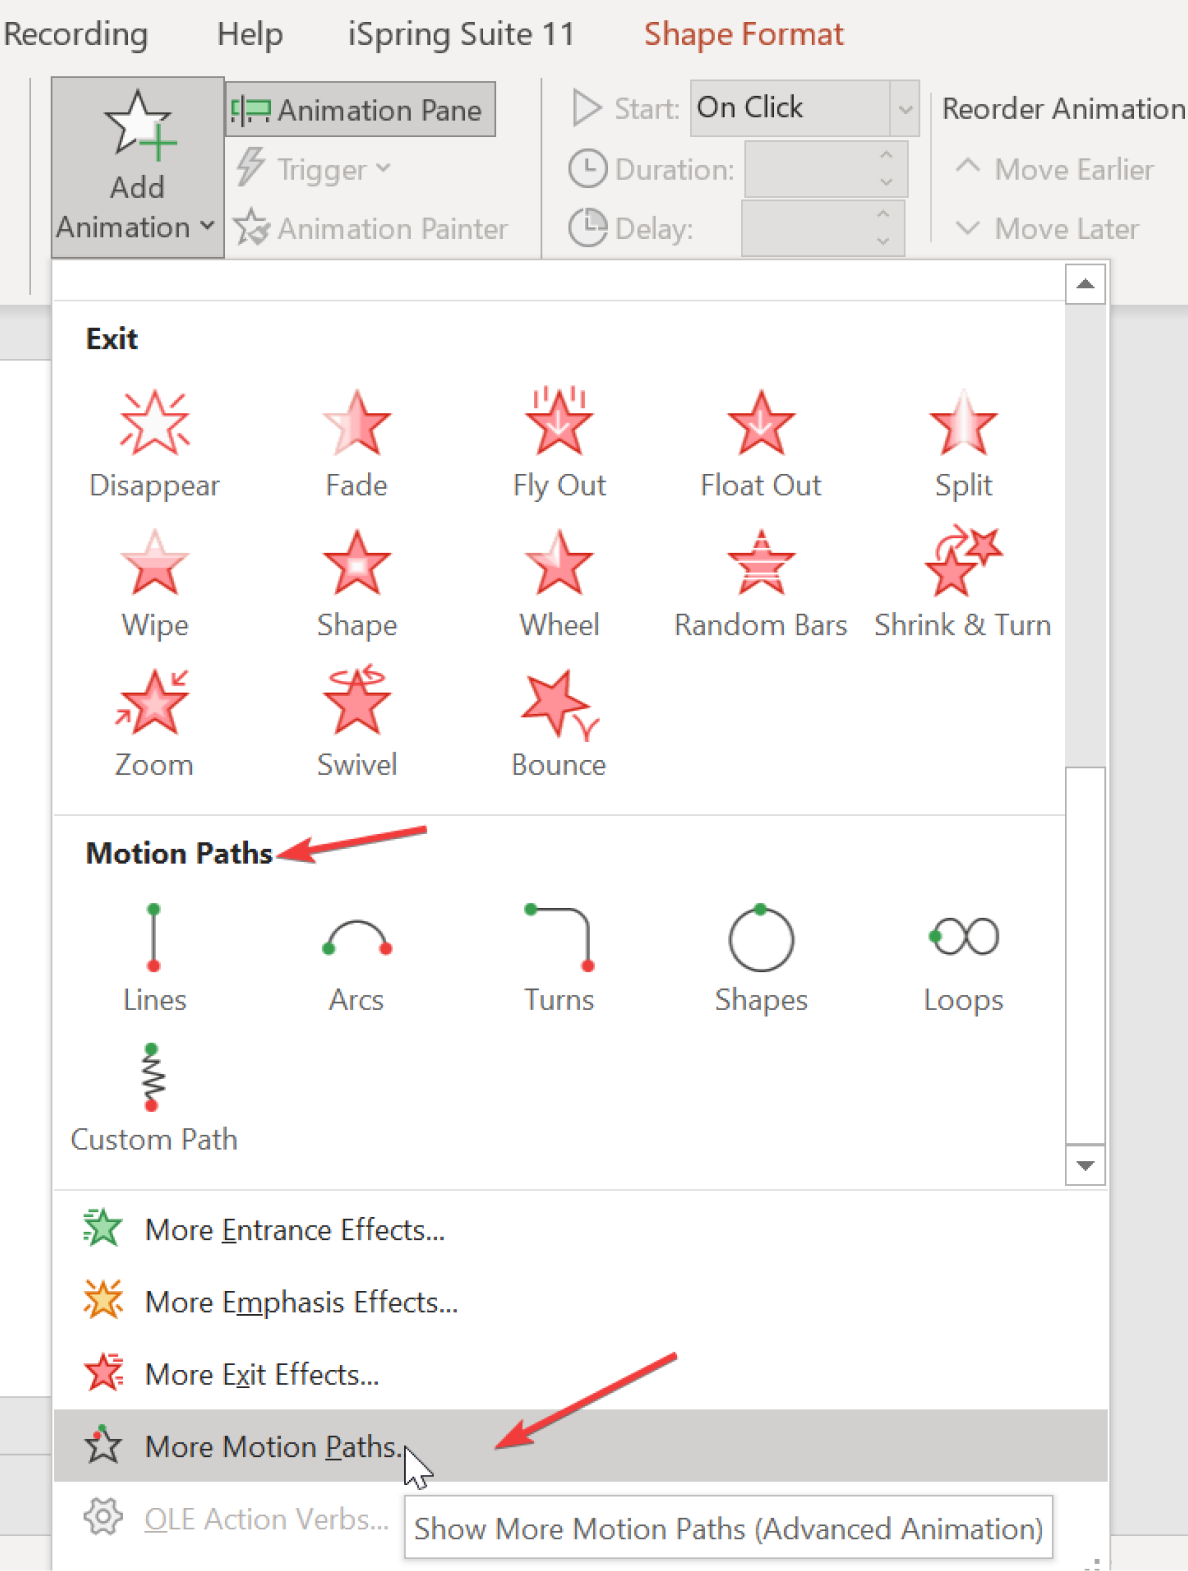
Step 2. Click Add Animation on the Animations tab.
Step 3. At the very bottom of the list, you’ll see Motion Paths and More Motion Paths. Pick the one that represents what you had in mind.
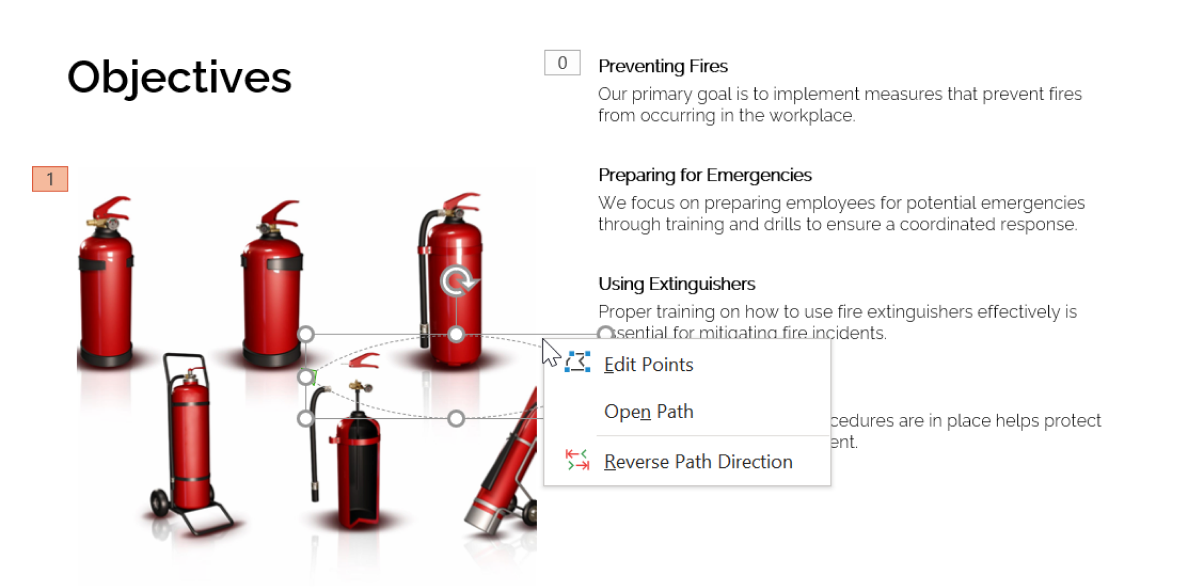
Step 4. The selected motion path appears on the animated object in your current slide. The green spot marks where the animation starts, and the red spot shows where it ends.
Right-click on the path and choose Edit Points to fine-tune its direction and shape.
If you choose Custom Path, you can draw a free-form motion path.
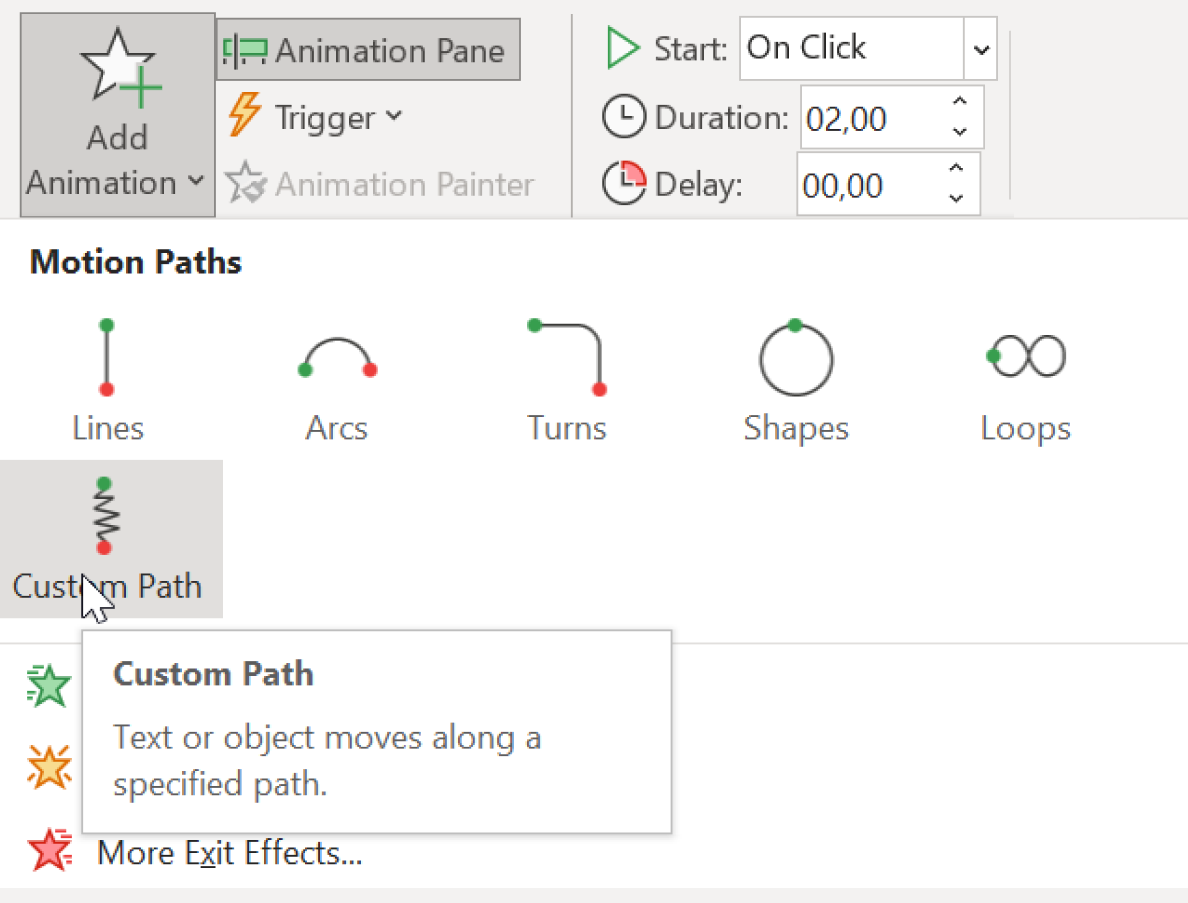
When you’re finished, press the Esc button.
3 More Custom Animation Ideas
Check out these animation approaches you can experiment with in your PowerPoint presentation:
1) The zoom in/out effect to enhance focus on specific details on your slide.
https://www.youtube.com/watch?v=Eji-QDa9Rnc
2) Make the entire slide flip like a digital brochure or e-book using PowerPoint transitions and create stunning digital brochure effects. Here’s how to create a flipbook in PowerPoint.
3) A clickable button that activates something, e.g., a clickable hotspot. Here’s how to build it in PowerPoint.
Conclusion
As you can see, there are plenty of interactive and engaging elements you can create quite easily. Hopefully, you’ve found ways to help bring some of your ideas to life in your next training module.
And if you regularly turn PPT presentations into self-paced training materials and want to save at least half of your time, book a live 30-minute demo with one of our eLearning experts to see if iSpring Suite is worth the investment for your use case.
To give you an idea of the increased impact, one of iSpring Suite’s customers, Consulman, now creates an hour of eLearning content with text and storyboard in just 3.5 days — half the time it used to take prior to using iSpring Suite.
FAQ on Using Animations in PowerPoint
Here are answers to common questions trainers ask when looking to make their PowerPoint course more interactive and memorable with animation effects.
How do I keep learners focused when using animations in PowerPoint?
The role of animations is to guide your learners’ attention and engage them in active learning. By using animations purposefully, you turn them into a tool for enhancing focus, not a distraction.
How do I import animations into PowerPoint?
You can add animations created or found somewhere else as GIFs or videos. GIFs are added via Insert → Pictures.
Can I create custom animations in PowerPoint for the Web?
You can apply multiple animation effects to a single object via Animation Pane and configure their behavior, but motion paths aren’t available in PowerPoint for the web.
Create online courses and assessments in record time.


How to Embed a Web Page in a PowerPoint Presentation
How to Voice Over a PowerPoint Training Presentation
How To Record a PowerPoint Presentation With Audio