The 9 Best Screen Recorders for PC: Free & Paid


There are many screen recorders on the market. Trying to find the best one can be overwhelming, but it gets easier once you determine your needs.
Read this detailed guide on the best screen recorders based on 9 common use cases, from streaming to webinar capture. Through in-depth testing, I picked the best screen recorder for PC for each category and are confident that at least one will appeal to you.
Key Takeaways
The article highlights nine reputable screen-recording software tools for Windows (and, in some cases, Mac), each designed for specific needs.
Key options include OBS Studio — a free, powerful choice for streaming and gaming; Camtasia — ideal when you need full video editing alongside screen capture; Loom — suitable for quick recordings and easy team sharing; Apowersoft — a browser-based recorder that doesn’t require installation; ScreenPal — a budget-friendly, straightforward video recorder; Free Cam — a lightweight, no-cost tool for simple tutorials; and EaseUS Screen Recorder — well-suited for webinars and meeting recordings.
The best fit depends on your priorities, whether you need advanced editing, simple screencasts, seamless sharing, or a no-install solution.
What Makes a Good Screen Recorder?

While finding the best screen recorder for a PC will depend on your needs, there are definitely some aspects and features that define solid screen recorder software. Keep an eye out for these functionalities:
- The ability to record your entire computer screen, a single window, or an area of your screen
- Webcam, system audio and video, and microphone audio recording
- Useful presenting tools, such as cursor highlighter, annotations, or captions
- High-quality recordings
- No watermarks
- Suitable export or sharing options, such as MP4
- User-friendly interface
- Value for money
While some of these factors may be non-negotiable for you and others are just a nice bonus, all screen capture apps should strive to deliver on the above features.
To identify the features that are necessary for your preferred screen recording software, you will first need to determine your use case and your target audience. Once you have those, you can narrow down the essential features.
For instance, if you’re going to get creative with your editing, then you may want to use a virtual green screen effect that’s available with some capture software.
Finally, consider your computer’s performance. If it’s older or struggling with basic operations, you might run into issues when recording resource-heavy programs like video games.
The 9 Best Screen Recorders for Desktop in 2026
| Best for | Screen Recorder | Standout Features | Pricing / Free Trial |
| Creating eLearning courses and instructional videos | iSpring Suite | Integrated instructional course designer | $970/year 14-day free trial |
| Live streaming and gaming content creation | OBS Studio | Powerful and highly customizable recording | Free |
| Quick and efficient screen captures on macOS | CleanShot X | Customizable shortcutsAdvanced annotation and editing | $29 or $8 per month (Pro subscription) |
| Extensive, professional-quality video editing | Camtasia | Powerful recording and feature-rich editing | $180/year3-day free trial |
| Quick screen recordings and easy sharing with teams | Loom | Simple and accessible capture-sharing service | Free version, and the paid version starts at $12.50 per month |
| Web-based recording without installation | ApowerSoft | No download needed | Free |
| Creating free how-to videos and demonstrations | Free Cam | Great UINo Watermarks | Free version$227/year |
| Recording webinars and meeting captures | EaseUS Screen Recorder | Scheduling and integrated audioEasy to use | $19.95/month$39.95/year$69.95 (lifetime) |

iSpring Suite is a powerful eLearning authoring tool for designing courses. It helps you create and share instructional videos and build eLearning content on a massive scale. Moreover, it’s arguably the best screen recorder for Windows.
- Available export formats: HTML5, MP4, SCORM, AICC, and others
- Recording modes: screen capture, webcam recording, audio narration, simultaneous multi-mode recording
- Editing capabilities: trim and crop, transitions and animations, overlay text and annotations, synchronization with slides, and more
Key features
I love the feature-rich screen recorder that iSpring Suite provides for educators and instructional designers.
- Audio and video quality. The tool delivers excellent audio and video quality and a range of click-and-drag effects.
- A user-friendly UI. One of my favorite aspects of the software is its simplicity – there’s virtually no learning curve with iSpring Suite.
- Video editing options. The tool offers a decent level of customization through its video editing and annotation features. I found it especially good for creating video lectures with minimal effort.
- Screen capture. This built-in screen capture tool is designed to record and edit instructional videos in a breeze. Even if you have no experience in video production, presenting, or screencasting, you’ll still be able to create professional tutorial videos with this platform.
I tried out iSpring Suite to design instructional videos and video tutorials, create a product demo, and record a webinar. On every count, iSpring Suite met my expectations and seemed well-designed and user-friendly.
I found the annotation and transition effects to be incredibly useful and naturally intuitive, truly enhancing the quality of the recording.
Perhaps the best thing about iSpring Suite is that it’s not just screen recording software but actually a comprehensive instructional design solution jam-packed with features. On top of that, you can take advantage of the iSpring Content Library. This is a stock media library of assets designed to further enhance your course creation process.
Pros
- User-friendly interface
- Different output options available, including HTML5, MP4, SCORM, AICC, and others
- 24/7 assistance via email, chat, and phone
- Built-in voice-over functionality
- Ability to make picture-in-picture screencasts or screencasts with annotations
- Ability to share training videos directly on YouTube or upload to an LMS
Cons
- The desktop version is based on PowerPoint and is only available for Windows users
- Not optimized for live streaming or gaming
- No mobile support for on-the-go recording
Pricing
Starts at $970/year. A free 14-day trial is available.
Who it’s best for
It’s perfect for training, education, and corporate learning settings because it’s great for creating screencasts, multimedia-rich material, tests, and simulations. It’s super useful for those who have no time to learn how to use a new tool because it’s a PPT-based software.


OBS Studio by OBS (Open Broadcaster Software) is one of the most widely used audio and video recording and streaming apps. It’s most popular with streamers and YouTubers who need to record or stream their screens and webcams simultaneously. I found it to be one of the most high-performing desktop screen recorders available.
- Available export formats: MP4, MKV, FLV, MOV, TS
- Recording modes: display capture, window capture, game capture, webcam recording
- Editing capabilities: scene composition and transitions, audio mixing with filters (e.g., noise suppression), real-time source cropping, scaling, and color correction, chroma key for green screen effects
Key features
I tested this app and found that the overall functionality and user experience were great. The app is designed for streamers or video makers who only need one take.
- High-quality video delivery. OBS Studio can produce high-quality video files with minimal effort. Once I took the time to learn the basics and get used to some of the more complicated features, OBS Studio was a joy to use.
- Real-time editing options. These include scene transitions, audio filters, and precise control over cropping, scaling, and color correction for a polished final product.
- Perfect for streaming. What’s most attractive about it is that once you have it set up, it’s a breeze to record or stream on the go. This is what makes it so popular with streamers — the ability to customize the experience for the audience midstream.
- Zero cost. Despite being feature-rich and the mainstay of professional casters, content creators, and video producers, OBS Studio is open source and thus completely free to use. For many users and use cases, OBS is one of the best screen recording software options.
The main drawback of this screen recording software is that it can require a significant investment of time to get the most out of its features. But once you do, OBS Studio really does stand out.
Another peculiar characteristic of this tool, besides its learning curve, is a lack of editing provisions. If you want to use the software to screen record, you need to be very prepared before you begin recording – OBS doesn’t provide any video editing functionality.
Pros
- Real-time video enhancement and customization capabilities
- A wide range of export formats
- Extensive community support and a plugin ecosystem
- Free software
Cons
- Steep learning curve
- Occasional instability with complex setups
- Resource-intensive on lower-end systems
Pricing
Free
Who it’s best for
It is a perfect choice for gamers and streamers who want to engage large audiences. It’s also great for tech-savvy Windows users.
Too much to read? Get a summary from AI
CleanShot X is the go-to screen recorder for Mac users who demand a sleek, intuitive interface paired with robust annotation and quick editing tools. Designed exclusively for macOS, it offers full integration with the system, making screen capturing and sharing easy for professionals and everyday users alike.
- Available export formats: MP4, MOV
- Recording modes: full screen recording, region-specific recording, window capture, scrolling capture
- Editing capabilities: basic video trimming, annotations, blur effects, quick markup tools
Key features
- Full macOS integration. CleanShot X features a minimalist design that aligns perfectly with macOS aesthetics, making it incredibly easy to navigate and operate. Its native integration also means quick access to system tools and notifications.
- Advanced annotation and quick editing tools. The built-in annotation options allow you to add callouts, highlights, and blur effects directly during recording, which is perfect for quickly conveying key information. This streamlined editing process eliminates the need for additional software, saving you both time and effort.
- Automatic cloud backup and sharing options. With automatic cloud backup, your recordings are securely saved in real time – no risk of data loss. The integrated sharing features make it simple to collaborate and distribute content instantly, which is a major plus for remote teams or collaborative projects.
What really makes CleanShot X stand out is its lightweight performance that minimizes system impact.
Designed to be resource-efficient, it ensures that your Mac remains responsive even during high-quality recordings. In other words, you can capture detailed content without worrying about your computer slowing down.
Pros
- User-friendly and specifically optimized for Mac
- Fast-operating, efficient screen recording with quick sharing options
- Automatic cloud backup streamlines content management
Cons
- Fewer export format options than some competitors
- Lacks comprehensive timeline editing for in-depth projects
Pricing
- $29 as a single payment (with limited storage)
- $8 per month for the Pro subscription (unlimited storage and extra features)
Who it’s best for
Perfect for professionals and creatives looking for quick editing and effortless cloud sharing on their Mac computers.
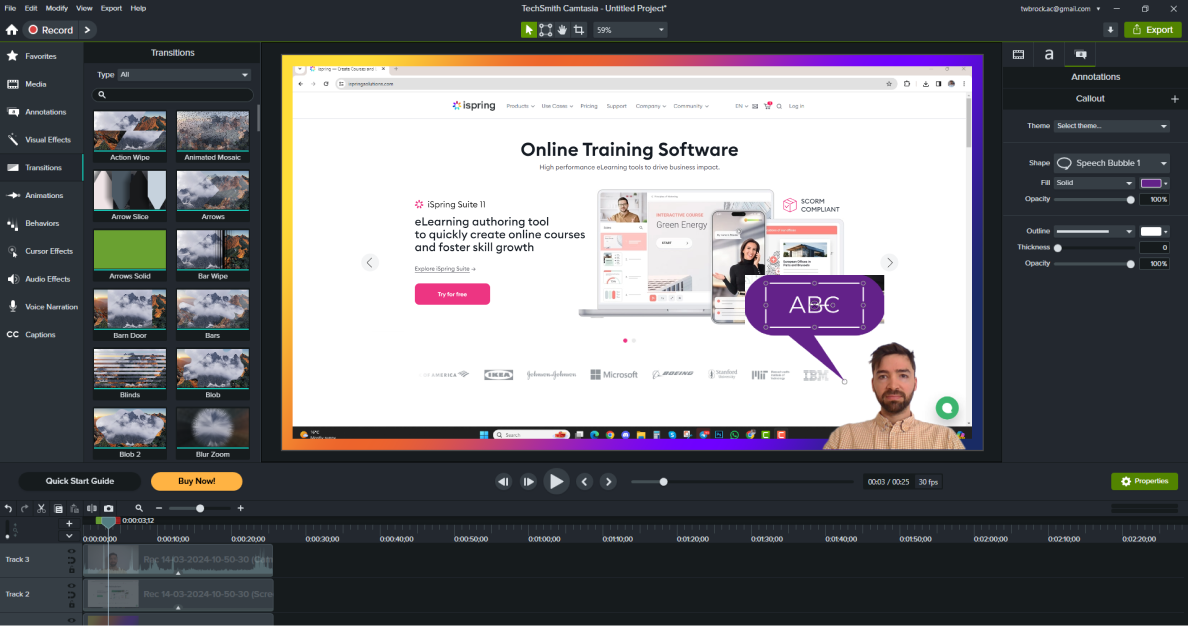
If you’re looking for an app that will let you record screen and webcam footage and then freely edit your recordings, then Camtasia is the app for you.
- Available export formats: MP4, WMV (Windows), MOV (macOS), Animated GIF
- Recording modes: full screen capture, region-specific capture, webcam recording, audio-only recording
- Editing capabilities: timeline-based editing, transitions, and animations, visual effects, annotations, callouts, cursor effects, and more
Key features
Despite its cost, it’s easy to see what makes Camtasia so popular.
- An outstanding edition studio. Once I tried out the recorder and had some footage to review, I spent hours with the Camtasia video editing tools test-driving the many advanced features available for creating intricate videos to a professional standard.Some of my favorite features included the easy addition of captions and text overlays, complete with beautiful animations. I also loved the huge asset library that allows you to add music, clips, images, audio, and video. Besides, Camtasia offers probably the best cursor effects of any app I’ve tested.
- Ease of use. The video capture software element of Camtasia is easy to use, straightforward, and effective. I experimented with full-screen mode for recording the entire screen, different windows, and also a custom area. Despite being so feature-rich, Camtasia doesn’t feel intimidating or overwhelming. Instead, it has an intuitive and simple interface and an exceptional collection of video tutorials and how-to guides that you can follow.Whereas a professional video producer or content creator might relish all the creative features it offers, a beginner is unlikely to feel out of place, as the software is a great option for all levels of ability.
I used the Camtasia 3-day free trial, which gave us plenty of time to assess its features. The full version is, however, quite expensive. Camtasia is priced at just under $180 for a yearly subscription, making it quite costly for a screen recording program, although reasonable for a screen recording app with a built-in video editor.
If you have your heart set on a single app that will fulfill all your screen recording and video editing needs, and you have the available funds, then Camtasia will not disappoint.
Pros
- Rich editing capabilities
- Advanced cursor effects
- Intuitive drag-and-drop interface
- An extensive library of assets and templates
Cons
- Upfront cost
- May require significant storage space for large output file sizes
Pricing
Starts at $180/year. A 3-day free trial is available.
Who it’s best for
It’s a great pick for educators, small business owners, and content creators who seek a comprehensive, user-friendly solution that combines high-quality screen recording with robust video editing tools to create polished content.
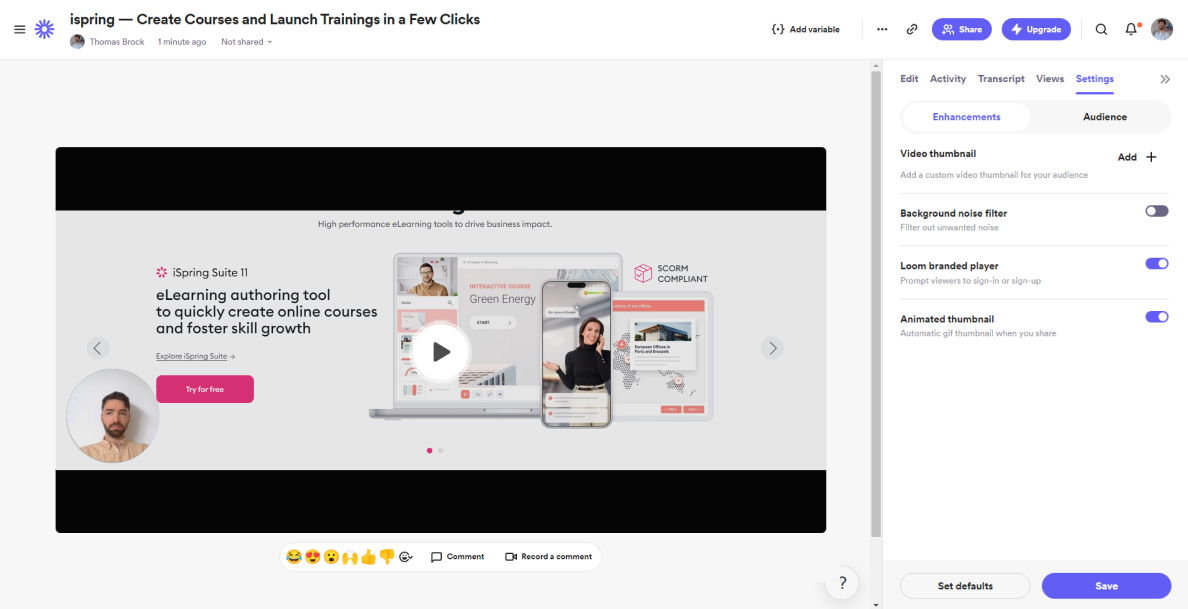
Loom is a really interesting screen recorder. Not being just desktop recording software, Loom is more of a video communication app that allows you to create your screen captures, edit, and share them instantly. I recommend it for creating short videos for quick explanations that need feedback without the hassle of holding long video meetings.
- Available export formats: MP4
- Recording modes: screen recording, webcam recording, combined screen and webcam (picture-in-picture)
- Editing capabilities: basic trimming, annotation tools, thumbnail customization, and simple callouts
Key features
Loom is a screen recorder for Mac, PC, smartphone, or tablet and works like any other screen recording software. It has a simple UI with user-friendly controls and features. Videos can be recorded at up to 720p quality with system sounds and even virtual backgrounds for your webcam feed.
- Easy sharing via a link. While the simple editing tools are slightly ahead of most other free screen recorders, they aren’t winning any awards. Where Loom truly stands out from the crowd is when you finish making your video. Once I made my video, I copied the link and shared it. With this link, other people could view, send emoji reactions, and respond to the content.
- Integrations with other platforms. Loom offers integrations with various workflow platforms, such as Slack, the concept being that you can quickly record, edit, and share videos with your colleagues to get their responses.
What you get in the free version
While it may not be the best screen recording software for all uses, Loom is easy to use and is, for the most part, free.
With the free version of Loom, you can use the main features of the service but are limited to making 25 videos per person and 5-minute time limits on videos. This might seem short, but Loom is designed for shorter videos. Five minutes is actually loads of time to quickly explain a workflow, a design feature, a single task, or highlight some code for a desperate colleague. Colleagues can then add time-stamped comments, making Loom a great tool for remote work.
They offer a paid version for $12.50 a month per user.
With the Business version, the key benefits are no time limits on videos and access to Loom’s AI and Transcript features. The auto transcript creator and editor sound like very useful features but are not exclusive to Loom, and it seems as though Loom AI has yet to develop its most useful features.
Overall, Loom is a very nice app on a desktop or a mobile device and is a great way to share audio and video files with your colleagues.
Pros
- Instant recording sharing via an online link
- Intuitive design, perfect even for novice users
- Integrations with workflow platforms like Slack and Notion
Cons
- Video editing limitations
- Requires a dedicated app
Pricing
There is a free version, and a paid one starting at $12.50 a month per user for unlimited videos and extra features.
Who it’s best for
Excellent for corporate communications using videos as tutorials and step-by-step guides.
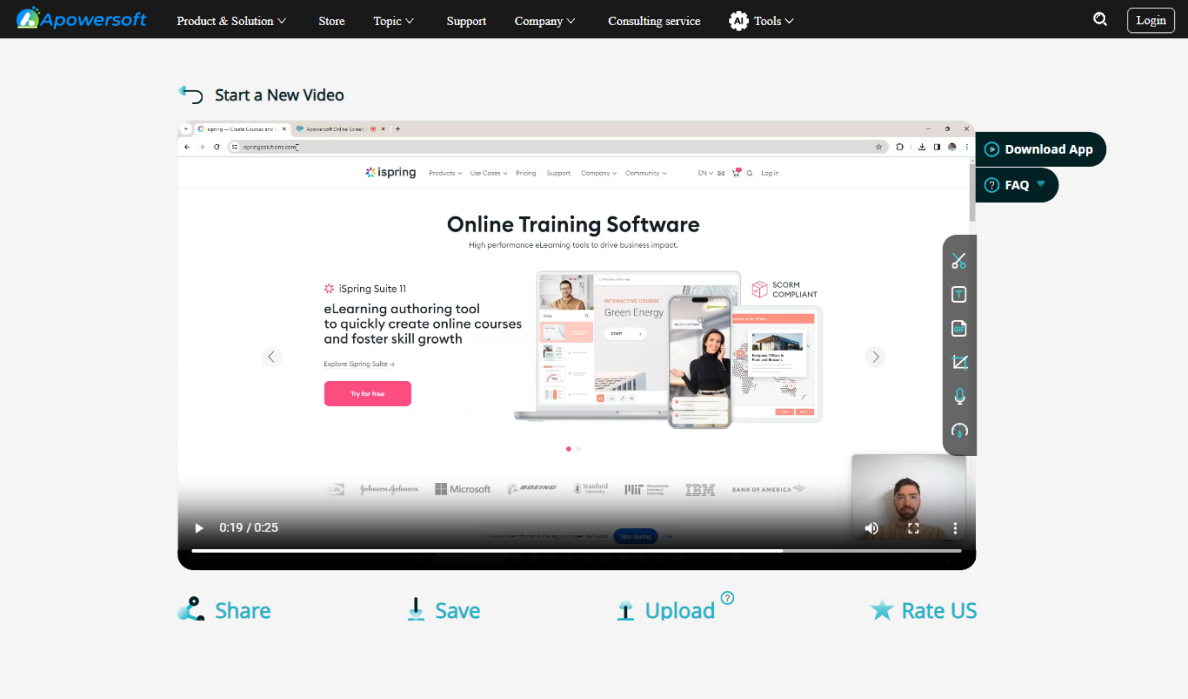
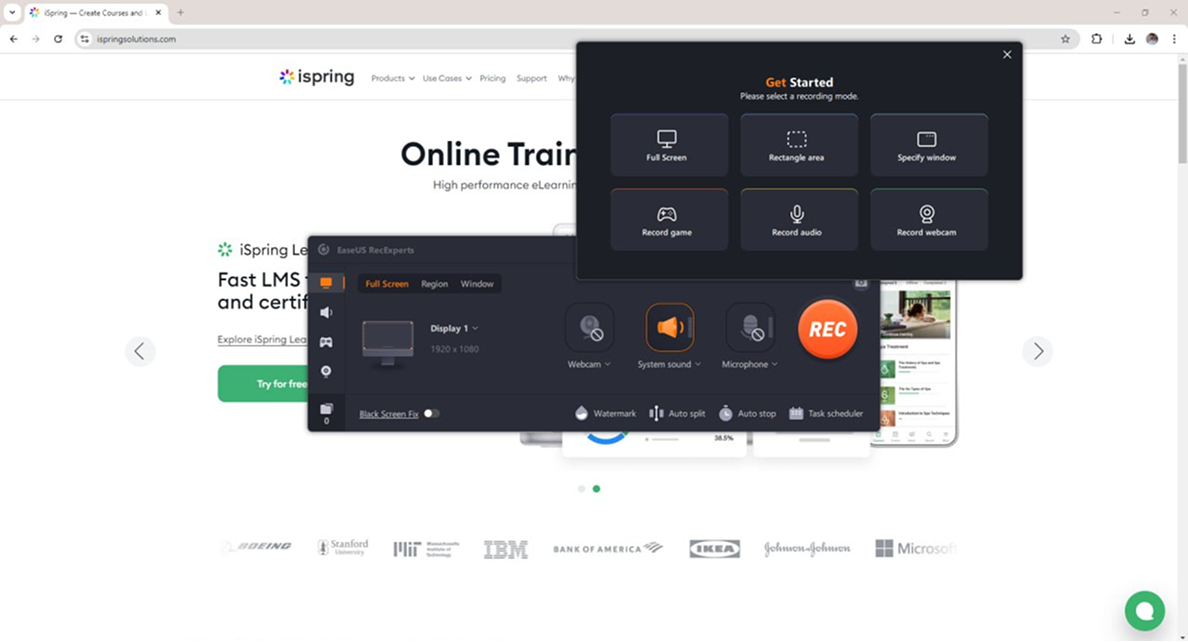
Apowersoft is my pick for the best entirely web-based screen recording software.
If you don’t want to download an app or you regularly use different computers for your remote work, then this solution may fit your needs exactly. It’s also completely free.
- Available export formats: WMV, AVI, MP4, MOV, MKV, FLV, MPEG, VOB, WEBM
- Recording modes: full screen recording, window recording, tab capture, audio-only recording
- Editing capabilities: basic trimming, cutting, merging clips, and simple annotation tools
Key features
While it might not be everyone’s use case, an online screen recorder that needs nothing more than a stable internet connection can be a handy tool.
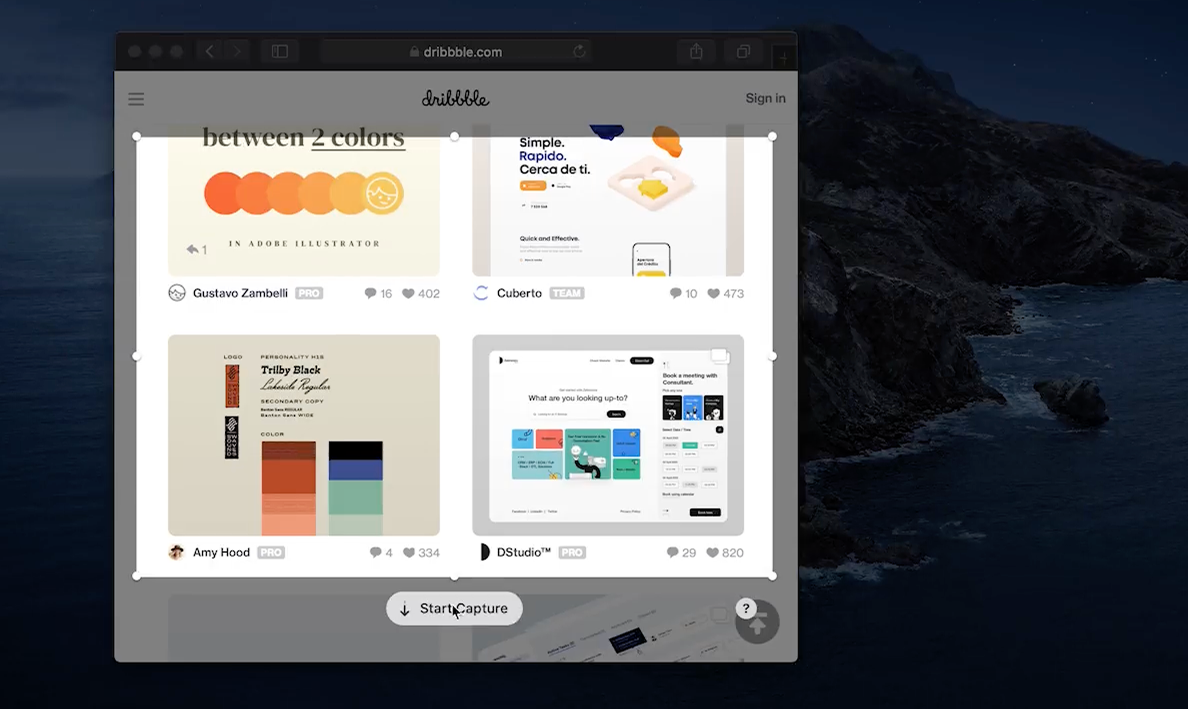
- Quick and easy recording. As explained on the website, you simply click on “Start Recording,” then select the full screen you want to record, and away you go. This makes Apowersoft one of the quickest ways to record content on Windows or Mac if you haven’t used one before.You can also include your webcam video in the recording to overlay on the screen, and you can include both the system sounds and microphone for audio narration.
- A wide range of export formats. Apowersoft supports multiple file types, ensuring compatibility with different devices and platforms without the need for additional conversion software.
- Instant online sharing. Once your recording is complete, you can quickly upload and share your content via a generated link or directly to popular platforms.
I found the platform to be exceptionally straightforward to use; the recording was of good quality and downloadable as an MP4 file. However, this app is certainly not full of features: there is no cursor highlighter, annotation tool, or editing feature.
It was especially useful for demonstrating more mundane tasks or showcasing websites.
I would recommend against using the recorder to capture gameplay, not least because you need a web browser tab open, which limits your system performance.
While Apowersoft may not be feature rich, you can choose to download their desktop app, which allows you to record a custom area, record without an internet connection, schedule recordings, add a watermark, and add a drawing tool.
If you’re dead set against investing your time, money, or disk space in a screen recorder, then this is a great pick.
Pros
- No download required
- Quick and easy setup
- Multiple export formats are available
Cons
- Limited editing functionality
- Limited video quality
Pricing
Starts at $19.95/month.
Who it’s best for
It’s the go-to choice for those who use multiple computers to work on their video recordings. Also, it’s a good option if you need a one-time screen recorder and don’t want to download any software.
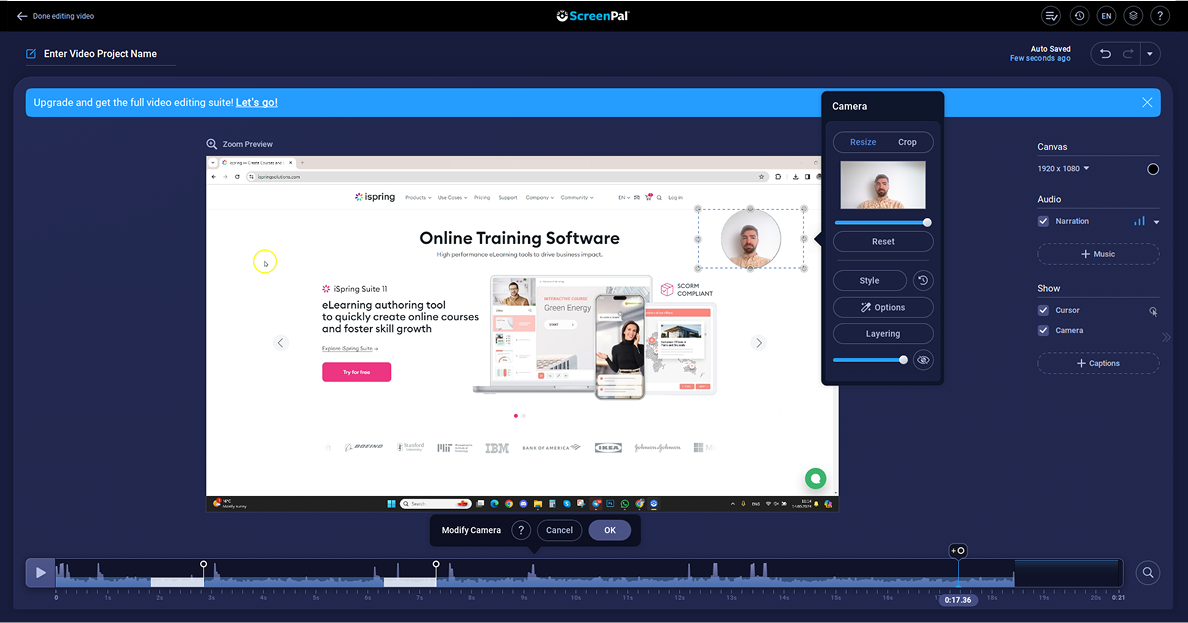
ScreenPal, formerly known as Screencast-O-Matic, is my pick for the best screen recorder for those on a budget.
While there are many totally free screen recording software options, regardless of whether they are simple apps, web-based programs, or open-source studios, most of them have some sort of limitation. If you’re looking for a simple, no-nonsense, and professional-looking desktop screen recorder with a generous choice of features that comes at an affordable price, then ScreenPal should be on your radar.
- Available export formats: MP4, FLV
- Recording modes: full screen recording, webcam recording, audio-only mode, combined screen and webcam recording
- Editing capabilities: essential editing functions such as trimming, splitting, captioning, and basic annotations
Key features
- Intuitive UI. I found ScreenPal to be extremely easy to set up and use.If you have used free or paid screen recording software in the past, then ScreenPal works exactly as you would expect. It records not just your screen but your webcam as well and can capture audio from your system and microphone. You can record audio and video in HD and export in MP4.
- A decent range of editing capabilities. ScreenPal has most of the features that the more expensive options boast, with solid editing options, annotation functionality, drawing tools, zooming, and custom dimensions. There is no free screen recorder that gives you anywhere near this array of features.
What you get in the free version
The free version of ScreenPal offers core screen recording features, including watermarked output and limited recording duration, making it a great choice for those on a budget. It also provides essential editing tools for basic trimming, splitting, and annotation, allowing users to produce polished content without any financial commitment.
I wouldn’t go so far as to say that ScreenPal is all you could ever need from a screen recorder, as other apps offer more ease of use, features, or customization, but are other options as much as 10 times better? We’re not so sure.
Pros
- Simple and intuitive UI
- A free version with basic functionalities available
- No video length limitations
Cons
- Lacks standout editing features
Pricing
Starts at $36/year per user. A free version is available.
Who it’s best for
This tool works well for anyone who needs to educate and engage with videos and images, but has a limited budget for their projects.
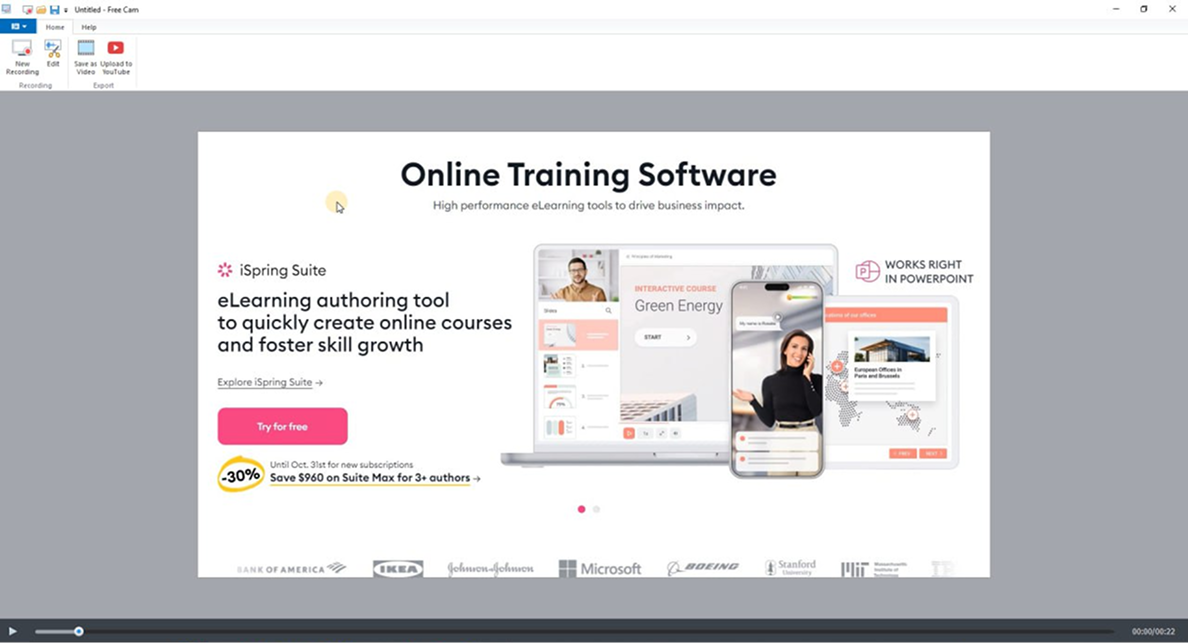
Free Cam is my pick for the best free recording software for making simple yet beautiful screencasts.
- Available export formats: WMV (with an option to convert to MP4)
- Recording modes: full screen recording, screen area recording, audio narration, and optional system sound capture
- Editing capabilities: a built-in editor for basic trimming, cutting, and adding background music; simple noise reduction tools
Key features
Most free screen recording tools come with so many limitations that it makes them unfit for most screen capture tasks and uses, but Free Cam is a desktop screen recorder that actually has its uses while also being totally free.
- Solid recording capabilities. This software lets you record your entire screen or just a specific window or area, record both microphone and system sound, and it comes with a handy cursor highlight.
- Post-recording enhancements. Free Cam also has some useful post-recording features. Using this screen recorder, you can not only trim your videos but also adjust the audio recording volume, apply a noise reduction tool, and add narration. After your edits, you can export your final product as a WMV file.
- A more advanced Pro version. While Free Cam is a good option as free screencast software, the paid Cam Pro version is a great option too. Those with a modest budget can benefit from some great additional features.The Pro Version comes with MP4 exports and 1080p resolution, along with webcam recording, multitrack timelines, and the ability to record separate voice-overs with ease. You can also add music, arrows, and other images, shapes, and annotations, making Cam Pro a tool that’s both powerful and robust.
Pros
- Easy-to-use screen recording software for Windows
- Ability to edit recorded videos
- No watermark
- No time limits
- Built-in voice recorder
Cons
- The free version of the tool has limited functionality: no options to export video to MP4 format or to add annotations or hotkey hints
- The only video format is WMV
- Recording quality is a maximum of 760p
Pricing
Free
Who it’s best for
With its core features and intuitive user interface, Free Cam is an excellent choice for screencasters or those who want to start making videos quickly at no cost.
The EaseUS screen recorder is my pick for the best screen recording software for capturing webinars and online meetings.
- Available export formats: MP4, AVI, MKV, WMV, MOV, M4V, WEBM or FLV
- Recording modes: full screen, region-specific, window capture, webcam overlay, audio-only recording
- Editing capabilities: trimming, cropping, merging clips, adding annotations, filters and transitions, and more
Key features
- High resolution videos. This screen recording software is attractive because of its ability to make UHD screen recordings with 4K or 8K resolution to give you the highest quality recordings imaginable. EaseUS delivers crisp, clear video and audio capture, ensuring every detail of your presentation is recorded accurately.
- Solid yet straightforward editing. With essential tools like trimming, cropping, and annotation, you can quickly refine your recordings into polished meeting recaps or webinar highlights without unnecessary complexity. Its advanced capabilities are great for working on streams or creative videos.
- An intuitive but powerful UI. The app is surprisingly easy to use and is supported by some strong design and user interface choices.
What you get in the free version
The EaseUS screen recorder offers a pretty usable free version but lacks some of the core features like advanced editing tools, scheduled recording options, and full export format support. Keep in mind that watermark-free videos are not available in the free version either.
Go for the free version if you need a straightforward tool for capturing webinars and meetings with crisp audio-video and basic editing options like trimming and cropping.
Pros
- UHD 4K/8K screen recordings
- Embedded video editor
- AI-powered noise remover
- Built-in voice recorder
Cons
- Restricted export options and customization settings
- Occasional performance lag during extended or high-resolution recordings
Pricing
- $19.95/month per user
- $39.95/year per user
- $69.95 (lifetime) per user
- $99.95 (lifetime) for Business subscription per user
Who it’s best for
Those with a focus on capturing professional webinars and meetings who value high-quality recordings over extensive editing features.
How I Tested the Best Screen Recorders
To get useful insights into the best screen recording software, I had to try out all of the features available to us. For the paid apps, I was limited to the free trials, but this didn’t limit my access to their list of features. For the free apps, I gave myself plenty of time to experiment with them.
I made sure to test the basic functionality of each option’s screen capture software.
Here, I looked at how easy they are to set up and use, how straightforward the recording process is, and how easy or difficult it is to maneuver through the various settings.
I recorded some footage of my screen and webcam, including system sounds and microphone input. Then I explored the post-recording options, such as editing videos (if present).
Finally, I made sure to check the exporting and sharing processes, and, of course, I assessed the quality of my final products.
Final Word
I hope this guide has helped you save time and effort when choosing the best screen recorders for a PC. If you’re still undecided between several platforms, hop on their free trials to get the feel of the UI and core capabilities. Nothing beats a firsthand experience, and you’ll see which screen recorder fulfills your needs best.
Frequently Asked Questions (FAQ)
I have gathered and answered some of the most commonly asked questions about Mac and PC video recording software.
What is screen recording?
Screen recording, or screen capture, means creating a video recording of exactly what your computer screen is displaying. This can include the sounds that your computer is making.
Most video recording software options will also give you the choice of recording your webcam and your microphone in order to create a single video recording of the three combined. There are many computer video recorders available, and some have these functionalities built in.
You can also find screen recording programs for your smartphone or tablet.
Screen recording software is incredibly useful to show others what you’re doing as you do it, or to record a tutorial, educational video, or display a product. Screen recording is also a great way to communicate important information in certain situations.
Lastly, desktop recording software has become an incredibly popular way of making entertaining videos to share online.
How can you record your screen in Windows 10?
Windows 10 now comes with two built-in screen recording tools that you may not have heard of. Neither of these options needs an internet connection to be used. These are the Windows Game Bar and the Snippet Tool. We’ll walk you through how to use both of these screen capture tools.
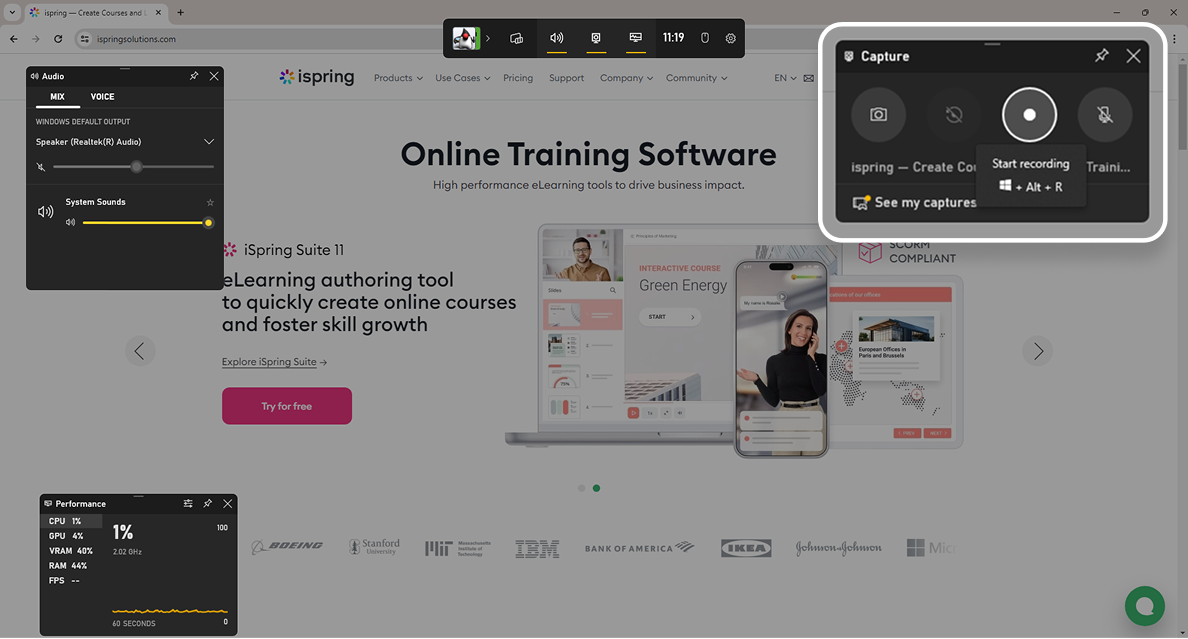
Game Bar
- Start by pressing the Windows key and G key at the same time — this will launch the game bar.
- Once the game bar overlay appears on your screen, you can select Capture from the options at the top of the screen.
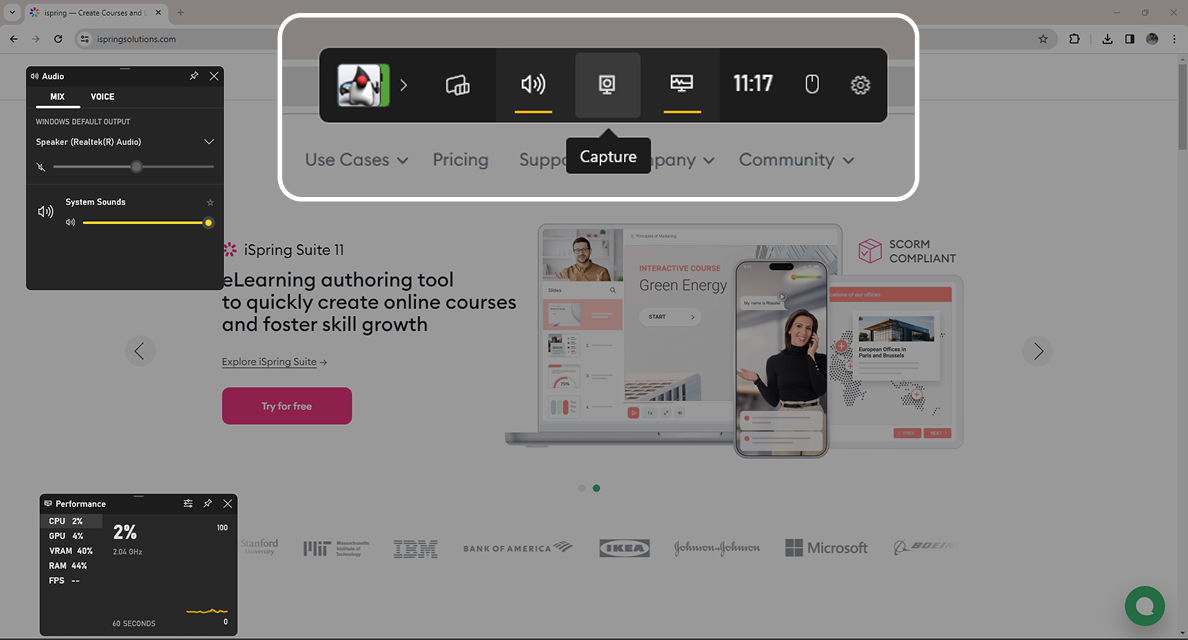
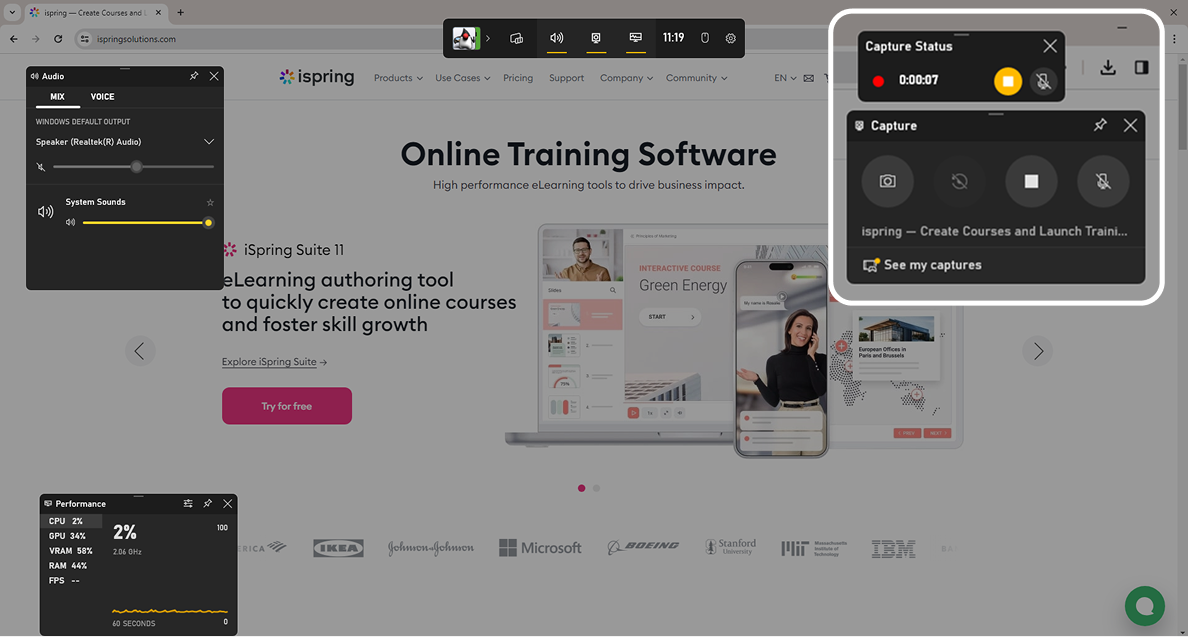
- The Capture window will open, and you can select Start Recording.
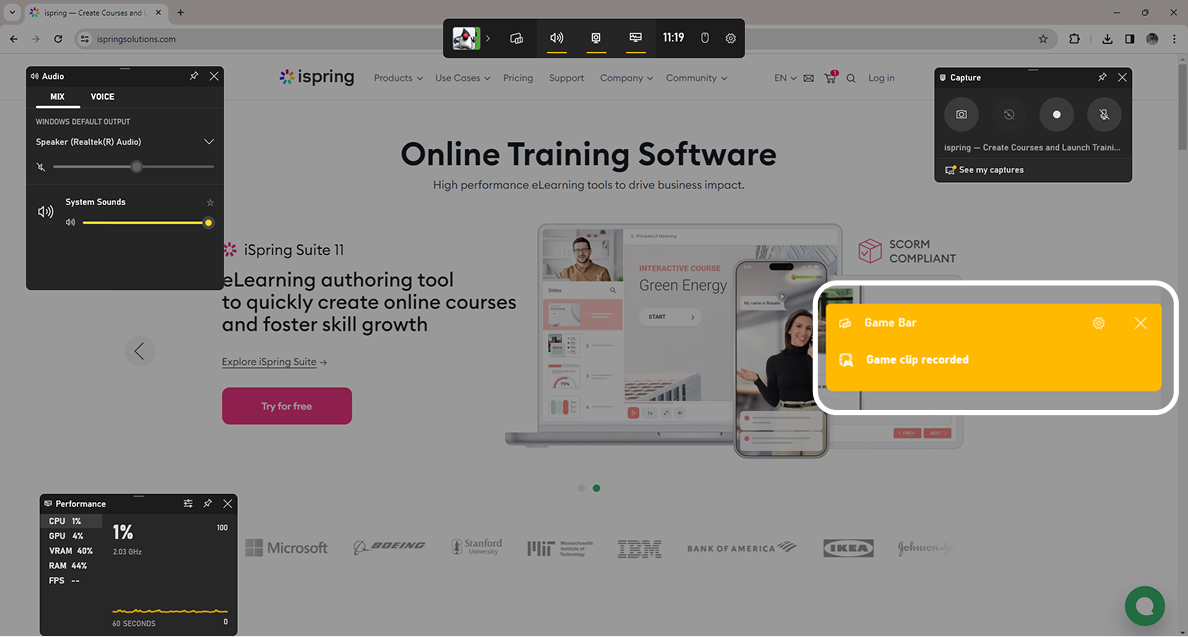
4. While recording, a window will open with a button that allows you to end the recording session.
- After you finish your recording session, a window will appear on the screen. Click on it to view your recordings.
Snipping Tool
- Start by opening the Screen snip tool; you can find it by searching for it in the Windows Start menu bar.
- By default, the Snipping Tool is set to take a screenshot. Select the record tab.
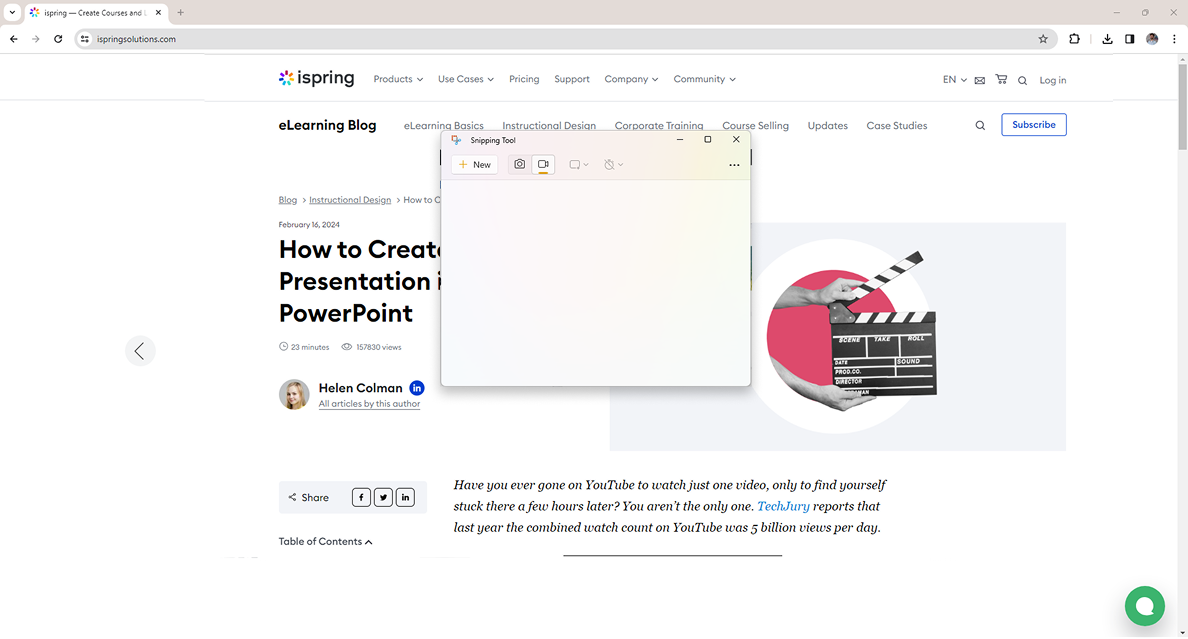
- Select your recording window and click on Start Recording.
- After you finish your recording, hit Stop Recording, and then you can view your video.
- Windows will then give you the option to edit your video in the built-in editor.
Please note that both of these Windows recording software only record your screen and do not record your webcam. They both come installed on all Windows systems and are used to take screenshots.
What equipment do I need for screencasting?
The answer is not a lot.
To simply record your screen, all you need is the computer itself, as many computers have built-in screen recording apps.
If you want to include a video of yourself with the recording, then you’ll need a webcam. If you also want to record your voice, you’ll need a microphone. Luckily, almost every laptop and many desktops come with both of these as standard equipment.
Lastly, you just need an app to do the actual recording, so check out my list.
What is the best free screen recorder for PC?
The best free screen recording software for PC is probably OBS — but that depends on what I mean by ‘best.’
If you’re planning to make a lot of recordings and are happy to learn how to get the most out of your recording app, then OBS is definitely the best. Also, if you’re willing to purchase a really good video editing app, then you have circumvented OBS Studio’s only shortfall.
If you only intend to make a one-off recording, then I recommend using Apowersoft, because it’s not only free to use but is also the fastest way to get your recording ready to go.
What is the best paid screen recorder for PC?
If you’re creating instructional material, then I highly recommend iSpring Suite for its huge array of instructional design features.
If you want an all-around recorder with amazing and easy-to-use editing tools and can afford the $180 price tag, then I suggest Camtasia.
For everyone else, I highly recommend ScreenPal. Not only does it have just about all the features you’re likely to want from a screen recorder, but it is also so reasonably priced that it makes other paid screen capture tools seem very expensive.
Screen Recorder Buyer’s Guide
In this handy guide, I go through the steps you should take when choosing the ideal screen recording app for PC or Mac for your use case.
How can I choose the best screen recorder?
Here are some steps to help you choose the best video recorder to capture your computer screen.
Identify your use case
- What do you need your screen recorder to do?
- How often will you use it?
- Is it just for you, or an entire team of people?
These are just some of the questions you need to ask in order to understand what functionalities you need your computer video recorder to have.
Decide which features are a must
All video capture software comes with many standard features, but some miss out on specific capacities, whereas others boast unique ones. You need to decide which features are non-negotiable for you.
Ease of Use
Understand your limitations. If you aren’t very tech-savvy, then you might find some screen recording software overwhelming, and you won’t be able to get the desired result, let alone make the most of the available features.
Editing capabilities
Some recorders have a built-in video editor, while others don’t. This is something you need to decide early on. Perhaps you don’t need to edit your videos; maybe you already have a video editor. Unless either of these is true, you’ll need a recorder with some degree of editing power.
Your budget
Sometimes budget is the easiest way to narrow down a choice.
If you absolutely need free screen recording software, then your decision-making process becomes a lot easier. If price is of little concern to you, then you have some good options in the higher price range. But if value for money is the determining factor, then it won’t take you long to decide.
Export options
This last one is very important.
Depending on what you need to do with your final product, you’ll need your video to be in a certain format. These days, MP4 is the gold standard, and HD videos are the norm. Check your requirements, and then use this information to narrow down your choices.
Create online courses and assessments in record time.


How to Create a Video Tutorial People Actually Want to Watch
How to Convert PowerPoint to MP4 Video on Windows and macOS
Video-Based Learning: How to Become a Training Video Ninja
The 21 Best Video Tutorial Software Programs: Free & Paid