iSpring Suite 8: New TalkMaster
Building conversation scenarios is an essential part of the e-Learning universe, especially for corporate training. Many businesses require employees to be comfortable having professional conversations with clients and/or colleagues, and simulating common scenarios is an excellent way to practice safely without any real-life consequences to the business.
iSpring Suite 8 brings this much-needed feature to e-Learning professionals in a single supercharged toolkit that is truly the all-in-one solution for teaching and training through technology.
So what can you do with iSpring TalkMaster? Here’s a video and a step-by-step walkthrough to get you started:
Creating a Scenario with iSpring TalkMaster
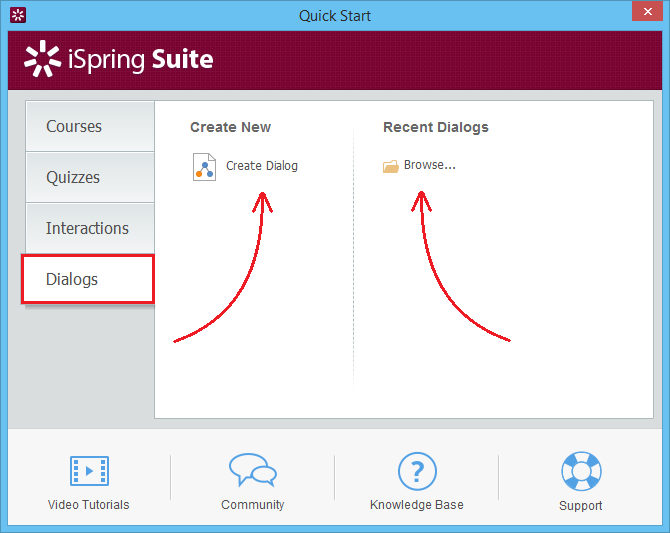
To open TalkMaster, double-click the iSpring Suite 8 icon on your desktop, and from the Quick Start window, go to the Dialogs tab. From there, you can create a new dialog, or open a previous one.
You can also go to the iSpring Suite 8 tab on the PowerPoint ribbon and click Dialog
.
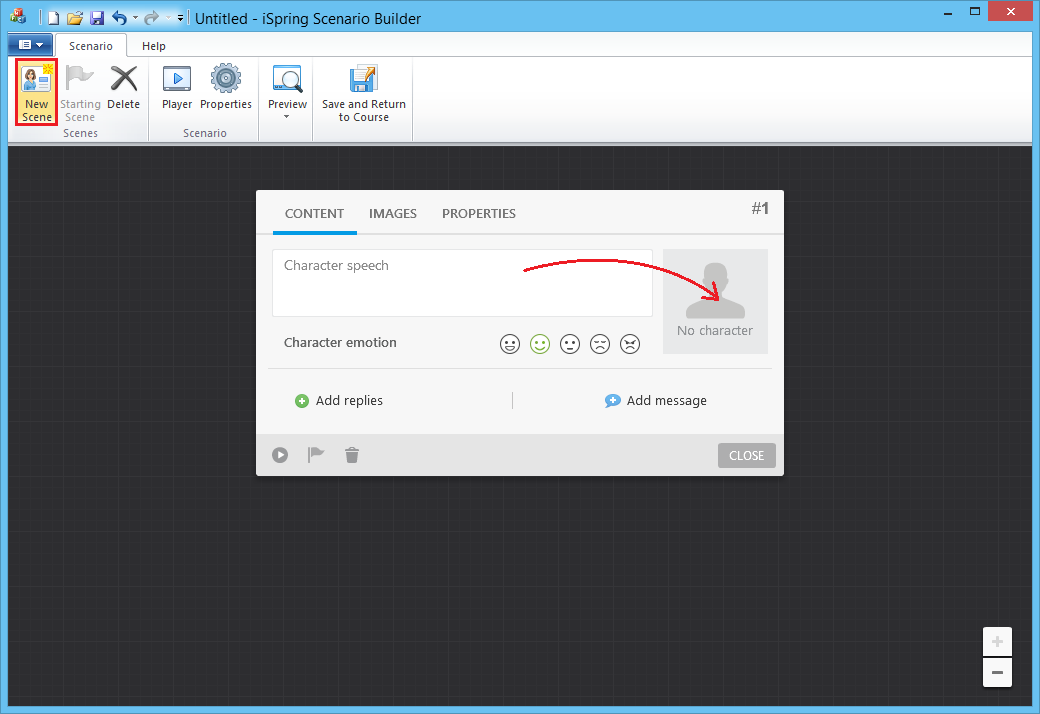
Once TalkMaster is open, click New Scene to create the first scene. Then, click the box that says “No character” to add a character and background.
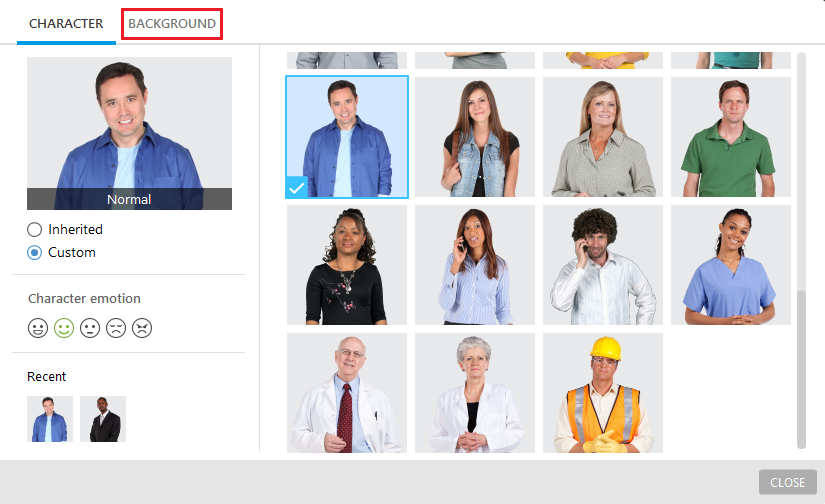
The character gallery will open up. Choose a character to appear in this scene, and then go to the BACKGROUND tab to choose a background from the background gallery. When you’re done picking your character and background, click CLOSE.
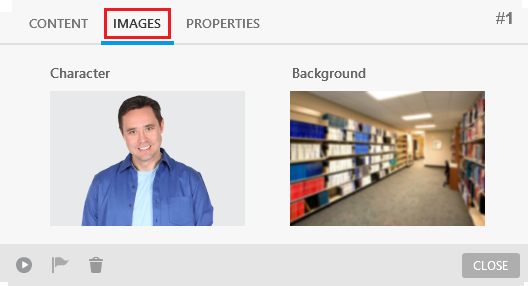
Back in the scene dialog, your character and background images will be accessible from the IMAGES tab if you’d like to change them later.
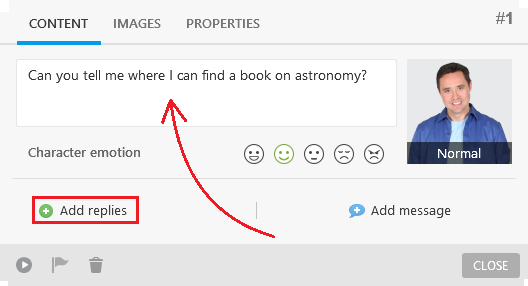
Back on the CONTENT tab, enter some text for the character to say, and then click Add replies to give the user some choices as to how to respond to the character.
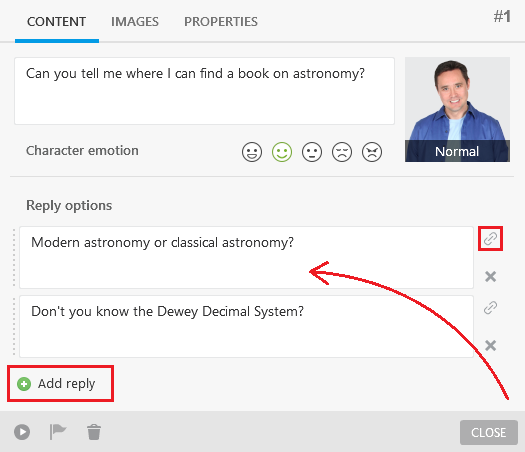
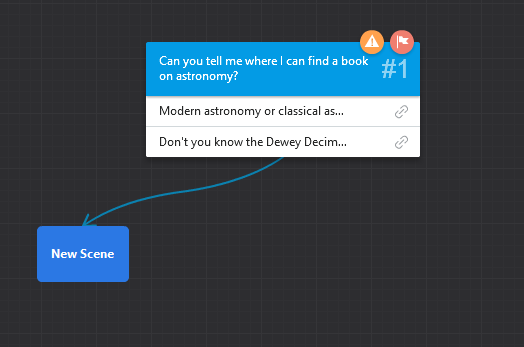
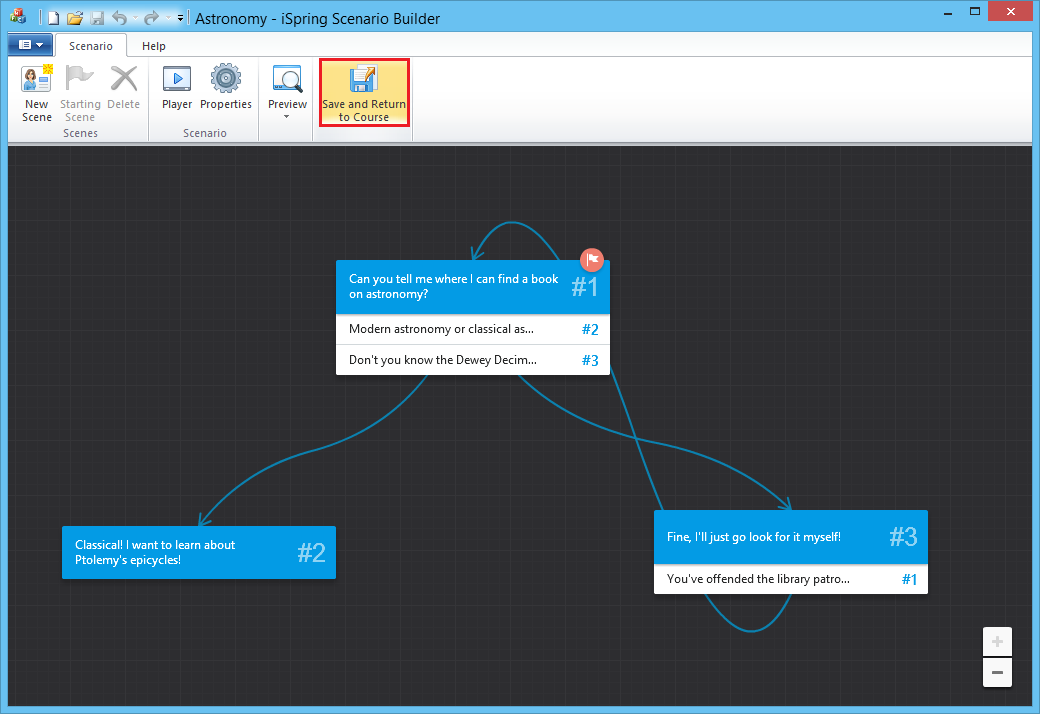
Add as many reply choices as you like; just click Add reply to add another one and then type in the text. When you’re done adding replies, you can start linking them. Click and drag the link icon off the scene dialog to create a new scene that’s linked to that answer.
*TIP In order to make the scenario helpful, you should add some possible replies that will have negative consequences so the user will learn what not to say.
Drag your new scene wherever you like on the dialog map, then let go of the mouse button to create it.
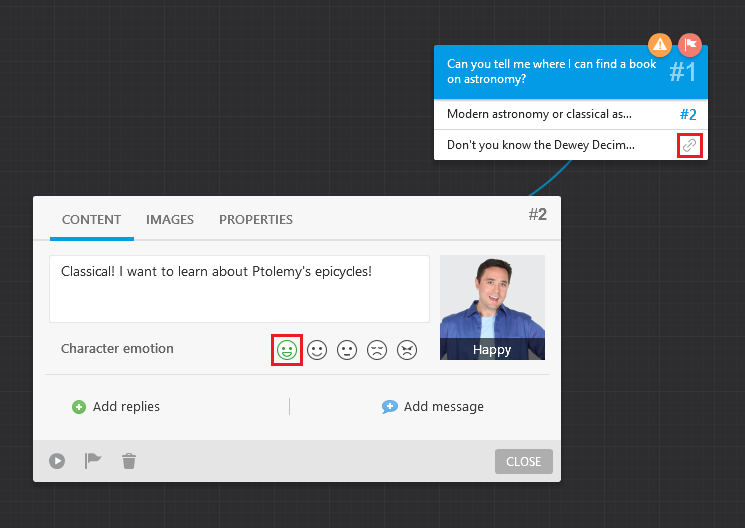
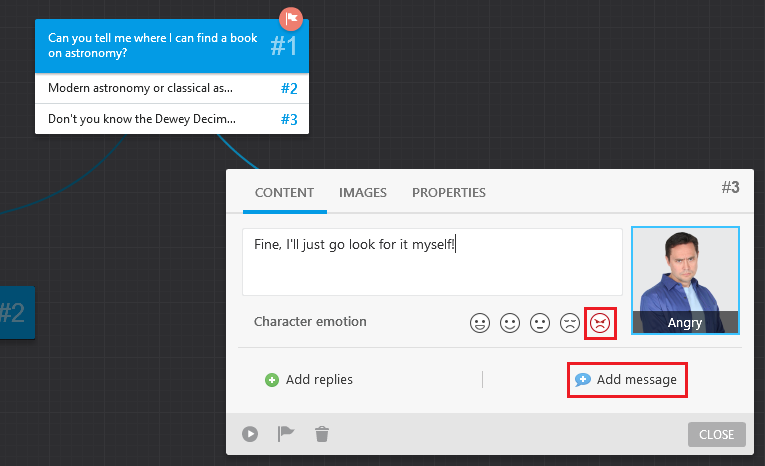
Type in the character’s answer. You can also change his emotion if you like. This not only makes a scene feel more natural, but can also encourage good choices and discourage bad ones. Then you can drag the link icon from the second reply and create a corresponding scene.
*TIP The colored circles at the top right corner of the scene give you information about it. The red flag indicates that scene is the first scene in the scenario. The yellow triangle means that one of the replies is not linked to any scene.
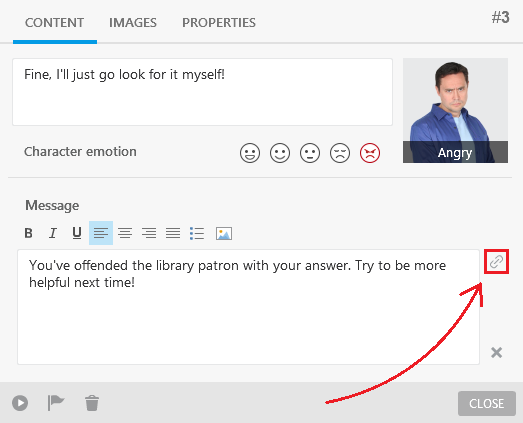
That second reply was pretty negative, so let’s give it an appropriate reaction. Change the emotion to Angry, and instead of adding possible replies, add a message to your user to provide constructive feedback.
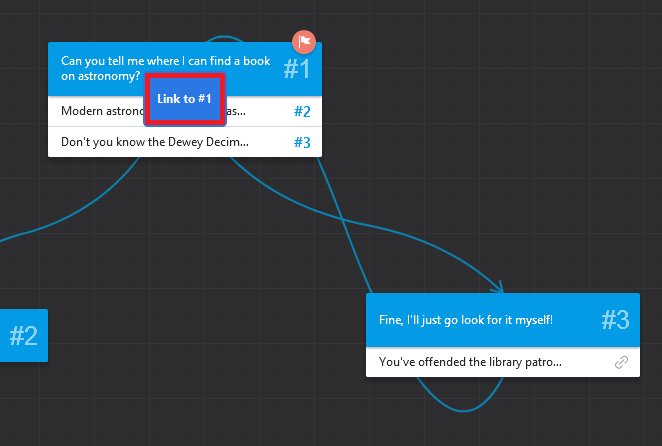
Add your message text. Then, once again drag the link icon out of the scene dialog to link it to another scene.
*TIP If you choose not to link a scene to another scene via message or reply choice, then the scenario will end. The user will be given two options: Restart, or Finish.
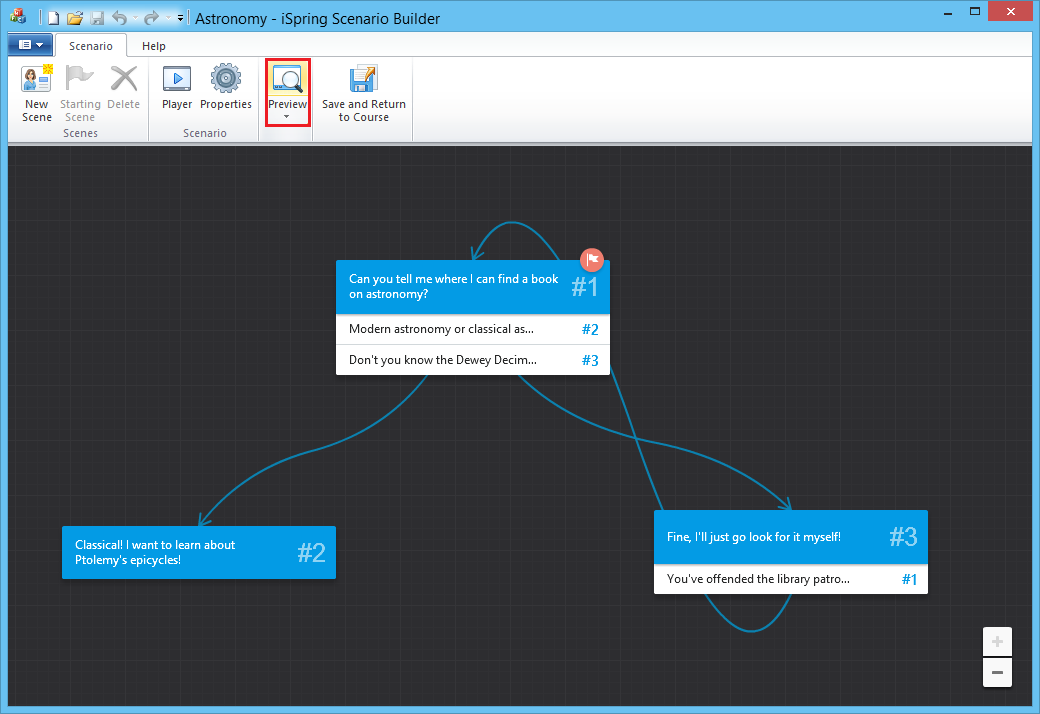
When you link a message to another scene, the user is shown a Continue button. By linking this failed scenario back to the first scene, the user is automatically given another chance to get it right.
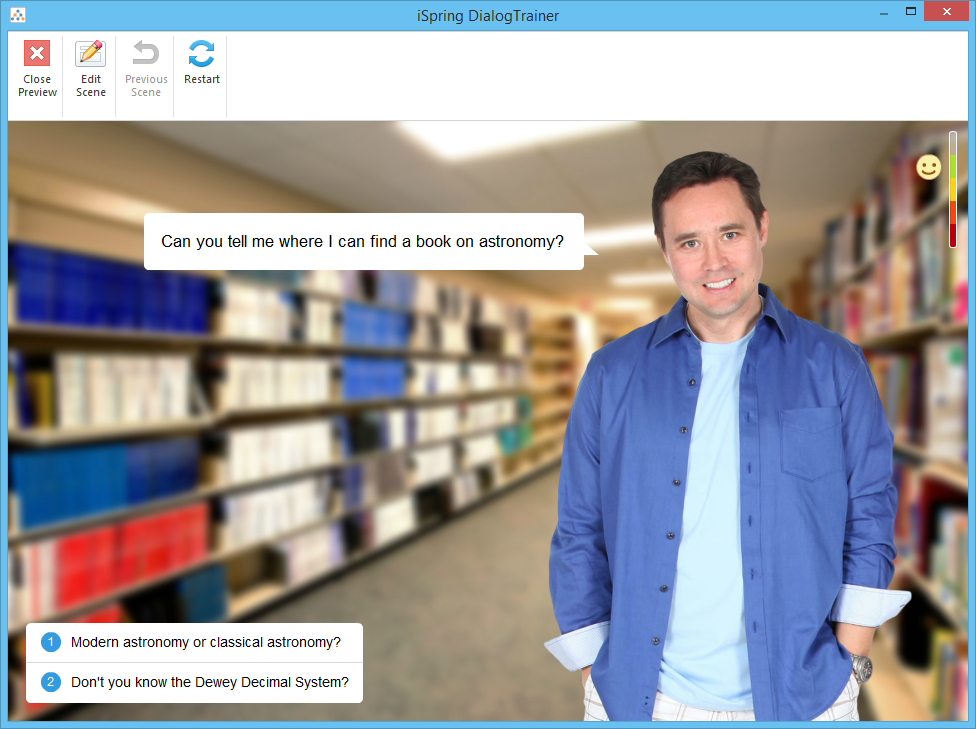
Whenever you like, you can preview your conversation scenario by clicking Preview.
The preview window will open. Here, you can see the character’s dialog with the answer choices on the bottom left. At any time, you can edit the current scene, go to the previous scene, restart the scenario, or close the preview by clicking the associated buttons on the toolbar.
When your conversation scenario is ready, click Save and Return to Course. The scenario will be inserted on the PowerPoint slide you had selected.
*TIP To publish a standalone conversation scenario, press Alt+F on your keyboard and select the Publish button. You can also open Conversation Trainer from the iSpring Suite folder on your computer to have access to the Publish button right from the toolbar.
Conclusion
iSpring Conversation Trainer gives you a fast and easy way to create even complex scenarios for business, sales, customer service, and more. Give your users a safe and comfortable environment to practice their skills and build a rapport with customers, associates, potential clients, or anyone else who’s important to your organization.
When you publish a conversation scenario, either directly from Conversation Trainer or as part of a larger PowerPoint-based course, you can be sure that everything will work flawlessly on any device. Users can practice on their tablets or mobile phones anytime, anywhere, making in-house training faster and easier than ever before.
Curious about the other new features in iSpring Suite 8? Stay tuned to the iSpring blog for more updates!
