How to Embed a Web Page in a PowerPoint Presentation

Imagine you’re in the middle of your webinar or your presentation at a live event. You’ve intrigued your audience with some details, have their undivided attention, your story is about to reach its climax – a demo of your product, a proof of your concept, or any other valuable knowledge – and you click on the link to go to the website and… here comes an awkward moment: you switch off show mode, change from the Microsoft PowerPoint window to Chrome, then turn on slideshow mode again. When you look back at the audience, they’ve already lost interest.
To avoid such situations, you might want to embed a web page in your presentation. The iframe tag will help you display an HTML document in your slides.
What Is an iframe?
An iframe (inline frame) is an HTML element that loads another HTML page within the document. In other words, it puts another web page within the parent page. It is commonly used for embedded videos, advertisements, and interactive content, and can be a great enhancement for your presentation.
Four Simple Steps to Insert a Web Page
Questions about iframe and HTML can intimidate some people, but, frankly, there’s nothing to worry about. You don’t need to make any operations with an embed code or do any other tech things.
With the right PowerPoint add-in, you’ll manage to add an object in a couple of minutes. You’re just required to take 4 easy steps. Let us guide you through them.
- Copy the URL (web address) of the web page you want to insert. If you don’t need the entire page, you can copy the URL of a specific element of the page.
- Download the free trial of Spring Converter Pro. With this tool, you’ll be able to embed not only live navigable web pages, but also media: audio, YouTube videos, and a lot of other content objects from external resources – and preserve the original quality.
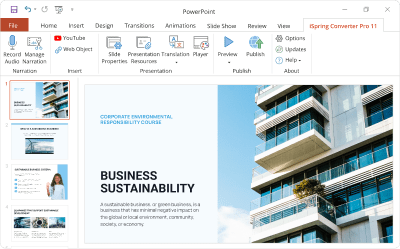
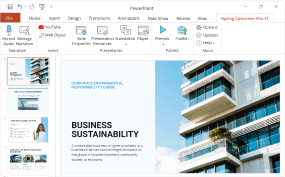
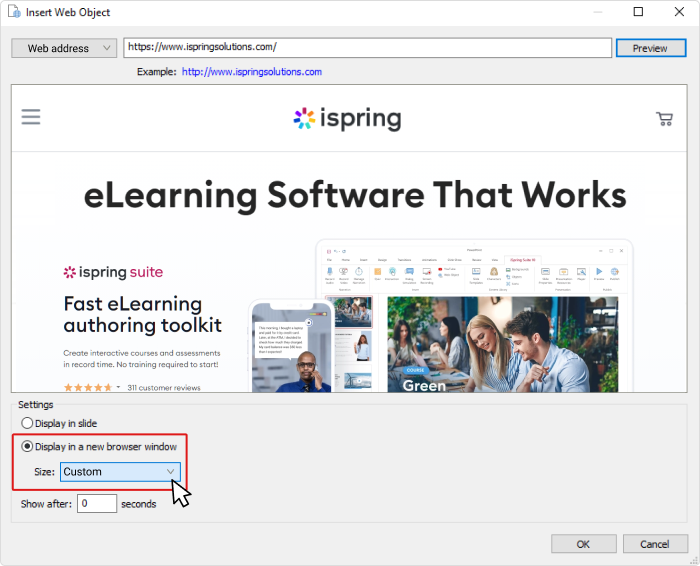
- Open PowerPoint. Find the iSpring Converter Pro 11 tab and click on it. Then choose the Web Object button on the toolbar.

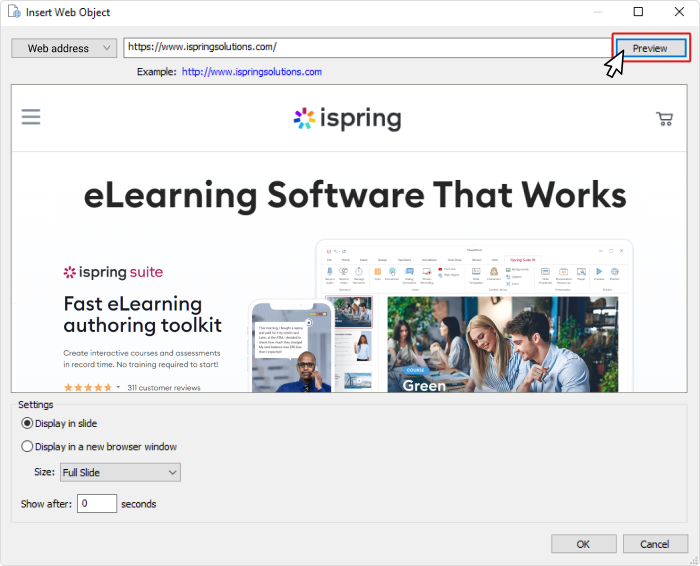
Paste the copied URL in the open window. Now, check to see if the address that you entered is correct by clicking on the Preview button.
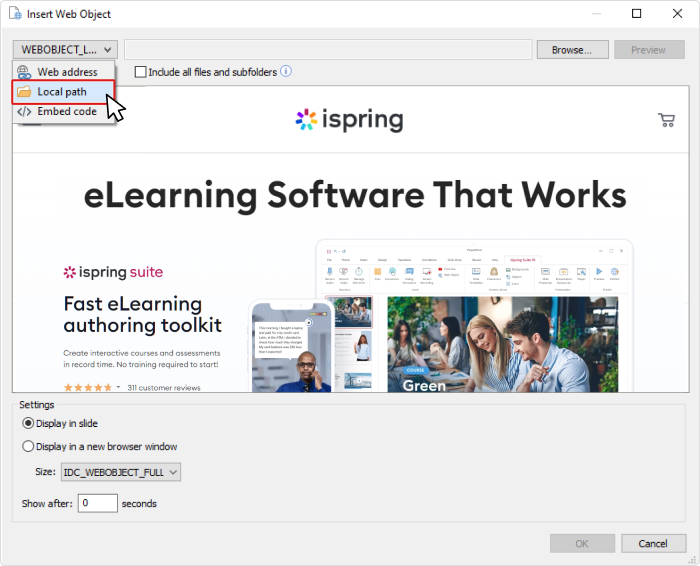
By the way, you can show web pages even when an internet connection is not available. To do this, you need to download the desired web object to your computer, and then add the file by choosing Local path instead of Web address.
Note: if you want to put additional web pages on your PowerPoint slide, or if you want to combine the webpage with other content objects, you should choose the Custom size option.
- Now that you’ve embedded web objects in your slides, let’s play them back. In order to do this, you’ll need to convert your presentation to HTML5. iSpring Converter Pro will do this work for you.
- Click the Publish button on the iSpring Converter Pro toolbar.
- Choose the My Computer option, type the name of the presentation, and select a folder you want to keep it in.
- Choose HTML5 format in the Output Options menu.
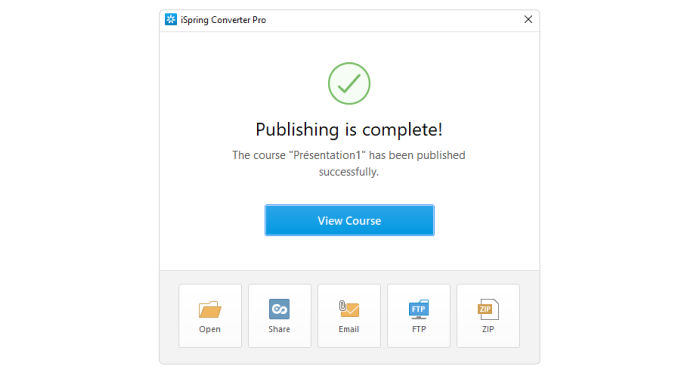
- Wait for the publishing process to complete and you’ll see a report window. Click on the View course button to learn if it looks the way you want it to.
Congrats! You’ve successfully embedded a web page in your PowerPoint presentation. Moreover, you can now share your presentation online easily. Viewers can open it right in a web browser on their computers, tablets, and smartphones without any special tools, even if PowerPoint isn’t installed on their device.
By moving presentations online, you can also be sure that your content is protected from being copied or modified. iSpring Cam Pro provides an entire range of security settings, including watermark protection, password protection, and domain restriction.
Also read: → How To Record PowerPoint Slides with Audio
Why Not a Screenshot?
We’ve already described an awkward real-life situation that you might find yourself in when using links in your presentation, but what about screenshots of websites? Sure, you can just make one and insert it into your presentation as an image with text and other elements displayed on the webpage. But this “technology” has some limitations.
- Screenshots are static. If your website has animations that make the user experience cool and engaging, you’re going to lose all these in your presentation.
- Screenshots are outdated. Depending on the website’s specifics, once you’ve made a screenshot, it may already be out of date and provide irrelevant information. Take the stock market as an example. Even a few minutes can make a huge difference. And what if you show your presentation to the public a few days, weeks, or even months after you’ve created it? Exactly.
- Images are not interactive. If you need to show your audience how they can interact with your website, such as how and where they can find the data they’re interested in, a screenshot will be of no use.
So, yes, you can use screenshots of websites, but they will not help you enhance your presentation, and they might even become a burden if you show your presentation regularly and thus have to constantly update screenshots in order to stay up to date.
To Sum Up
Embedding a web page in a presentation is fairly simple if you have the right app. iSpring Converter Pro is a perfect solution that helps its users enrich their presentations and keep them relevant and interactive. In this way, you can save time and effort that is otherwise spent with regular manual updating. You won’t have to disrupt the flow of your presentation in order to change from the PowerPoint tab to Google Chrome. You only need to follow our guide, and you’ll get a constantly up-to-date presentation that you can convert to online formats that display perfectly on any device. Start with the iSpring Converter Pro free trial and see how handy and engaging it is to have live web pages in your presentations.
Useful Resources on Using PowerPoint
- How to Make a Jeopardy Game in PowerPoint
- How to Make a Quiz in PowerPoint
- How to Create a Mini Game in PowerPoint: A Step-By-Step Guide
- How to Convert Your PowerPoint Presentation to an eLearning Module
- How to Insert a YouTube Video into a PowerPoint Presentation
- How to Structure a PowerPoint Presentation
- 10 PowerPoint Tips to Make Your Slides More Effective
- 23 Top PowerPoint Add-ins and Plug-ins – Free and Paid for 2022
- How to Convert PowerPoint to MP4 Video on Windows & macOS
- How to Add Narration to a PowerPoint Presentation


