How to Create an Employee Training Video: A Practical Guide & Tips

From cooking shows on TV to Photoshop tutorials on YouTube, training videos are everywhere. They also hold a strong position in corporate training. In fact, training videos are one of the top 3 ways that employees like to learn. The thing is, when you watch a video, you can perceive the information more easily and retain it longer.
In this article, we’ll share our ideas on how to create training videos and provide you with 6 tips to help you make them even more effective.
Here’s what you’ll learn in greater detail:
- What is a Training Video?
- Why Create Training Videos?
- What Makes a Great Training Video?
- Types of Corporate Training Videos
- Equipment Needed to Record Employee Training Videos
- How to Create an Effective Training Video
- Training Video Software
- Tips for Making More Effective Training Videos
- How to Measure the Success of a Video Training
What is a Training Video?
A training video is one that provides knowledge that can be put into practice. Chances are you’ve found yourself wondering how to do something new correctly and turned to training videos on YouTube for some quick help at one point or another.
With training videos, you can learn some needed information that has been studied, gathered, and presented by others. Watching a video is a simple way to gain new knowledge and then go into more detail through reading if needed.
You might be thinking, “It’s pretty clear why people watch videos. But why would I make them in the corporate sphere?” We’ll explain why.
Why Create Training Videos?
Using videos for employee training might be a good solution for the following reasons:
- Video is more compelling and engaging than text. It combines sound and pictures and involves more of our senses. Even a brief training video added to a course can make it more vivid and, consequently, more engaging.
- Training videos improve knowledge retention. Research shows that 83% of people prefer watching videos to getting information or instructional content as text or audio. Learners also find video content more effective when it comes to knowledge retention. That’s because this medium presents content in a structured way, and it’s easy to replay videos whenever a learner needs to repeat the material.
- Videos are more accessible and easier to consume. To find the solution to a problem, learners often consider it more practical to refer to a short video on a mobile device rather than a book. For example, they can watch it on their smartphones in the subway, during a break from work, or while cooking or doing housework.
- Videos can reduce training costs. With a recording, it’s possible to make a training video replicable for internal use. This is especially important for large companies with geographically dispersed teams. Video training will help them reduce repetitive instructor fees and other costs: there will be no need for venue, travel, and accommodation expenditures for training staff.
What Makes a Great Training Video?
When considering how to create a training video, make sure the content is tied to the learning objective and relevant to the audience.
To produce a great training video, keep the following key aspects in mind:
| Aspect | Explanation |
| Clarity | Present information in a way that’s clear and understandable, and avoid unnecessary jargon or complexity. |
| Structure | Organize the content logically with a well-defined structure, making it easy for viewers to follow and comprehend. |
| Length | Optimize video duration for viewer engagement, balancing comprehensive coverage with concise delivery. |
| Interactivity | Incorporate interactive components, such as quizzes or simulations, to enhance engagement and reinforce key concepts. |
| Visual appeal | Use visually appealing graphics, animations, and aesthetics to make the video visually interesting and memorable. |
| Accessibility | Make the training video accessible to a diverse audience by providing subtitles, transcripts, or other accessibility features. |
| Feedback mechanism | Incorporate feedback mechanisms like surveys or quizzes to collect insights and assess training results. |
Types of Corporate Training Videos
Whether you work in a professional training video production studio or are just starting to produce training videos, you need to figure out what type of training videos are better to use, depending on your purposes. Here are some for your consideration:
1. Talking head video. This type of online training video shows a person who addresses the audience directly through a camera as if they were face-to-face. Use this type when you need to deliver instructions to the entire staff. For example, inform them about a new product or convey company policies, values, or procedures.
2. Animated training video. With animated graphics, characters, and storytelling, these videos bring complex concepts to life in a visually engaging manner. This type is ideal for making complex information more accessible.
3. Screencast video. Capturing the screen’s activity along with a voice-over narration, screencast videos are useful for demonstrating software processes, computer workflows, or system functionalities. Screencast trainings are often used as customer service training videos.
Also read: How to Make a Screencast in 6 Easy Steps
4. Whiteboard explainer videos. Featuring handwritten key details on a whiteboard, these videos are effective for breaking down and explaining complex ideas or processes step by step. They are valuable as procedure and concept explainers.
Also read: Best Explainer Video Software
5. Text-based video. By employing on-screen text and graphics, text-based videos focus on concise messaging to convey information efficiently. They’re suitable for delivering quick updates or compliance information.
6. Conference video. Valuable for capturing and sharing conference proceedings, these videos ensure that insights, discussions, and presentations are accessible to a wider audience beyond the event.
Equipment Needed to Record Training Videos for Employees
It was previously thought that professional video cameras, or at least camcorders, were necessary for video recording. But now we can use smartphones to film training videos of decent quality.
However, to record audio, it’s better to use separate audio equipment — at least an external microphone. A Lavalier microphone will be most appropriate for this type of training video. It’s clipped onto a presenter’s clothes to amplify their voice and can be hidden from view.
How to Create an Effective Training Video
As mentioned, a training video can be made in a snap with an easy-to-use tool like iSpring Suite. If you still don’t have it, you can download it for free now. Keep reading to find out how to record training videos with our step-by-step instructions.
Also read: What Are Tutorial Videos and How Can You Create Them?
Step 1. Prepare all the materials
The first task at hand is to write a script, or at least make a list of the key talking points to be referenced when you’re recording. Also, prepare PowerPoint slides, images, demos, and other content items that you’re going to use while capturing a video.
A detailed script is essential for creating engaging and effective training videos. It provides a clear outline, ensuring the organized and effective communication of information. It also enables trainers to convey content systematically, engage learners more efficiently, and enhance the overall learning experience.
How to write a video script
Use these 7 essential tips that will help you generate an instructional video script:
- Write a plan for the training with the learning objective in mind.
- Keep the chosen type of video in mind to ensure that your content aligns seamlessly with the video format.
- Speak as if you’re describing the topic in person. In this way, you’ll provide a natural and engaging delivery without the need for significant adjustments while recording.
- Avoid clichés and inappropriate humor.
- Keep sentences short and to the point.
- Stick to the story structure to make it logically consistent.
- Read the entire text out loud.
- Make sure your script has a clear call to action (CTA).
Training video script example
Take a look at this example of a screencast video script outline for a customer service training video:
[Opening Scene]
[The screen displays a customer service interface with relevant software.]
Speaker: “Welcome to our customer service training! In this screencast video, we’ll guide you through essential tools and practices that will allow you to provide exceptional customer service.”
[Scene Transition]
[The screencast demonstrates navigating through the customer service software.]
Speaker: “First, let’s explore our user-friendly interface. Familiarize yourself with the dashboard, as it’s the hub for managing customer inquiries and resolving issues.”
[Scene Transition]
[The screencast demonstrates how to access customer information.]
Speaker: “Efficient service begins with an understanding of your customers. Learn how to access and review customer information promptly. This ensures personalized and effective interactions.”
[Scene Transition]
[The screencast demonstrates using predefined responses for common queries.]
Speaker: “Save time and maintain consistency by utilizing predefined responses. We’ll show you how to craft responses that are clear, friendly, and align with our brand’s tone.”
[Scene Transition]
[The screencast illustrates handling challenging situations.]
Speaker: “Customer service isn’t always smooth sailing. We’ll provide tips on handling challenging scenarios with professionalism and empathy. It’s all about turning a problem into an opportunity.”
[Scene Transition]
[The screencast covers how to escalate issues when necessary.]
Speaker: “Know when and how to escalate issues. Sometimes, a situation requires additional expertise. Learn the steps to ensure timely resolutions for our customers.”
[Closing Scene]
[The screen displays a summary of key points.]
Speaker: “That wraps up our customer service training screencast. Remember, a satisfied customer is a loyal customer. Thank you for your commitment to providing outstanding service!”
[End of Video]
Step 2. Set up the recording environment
iSpring Suite allows you to record videos with minimal equipment. You just need a computer with the best training video software installed, a microphone, and a USB webcam, or a laptop with a built-in mic and camera. When you open the video recorder, it will automatically detect any connected devices.
After you connect the audio and video feeds, prepare your computer for smooth functioning. Close apps that are not involved in the recording process, especially those that show alerts or pop-ups.
Step 3. Make a test recording
After you install iSpring Suite, double-click on its icon on your desktop. In the Quick Start window, select the Screencasts tab. Choose New Recording in the Create section.
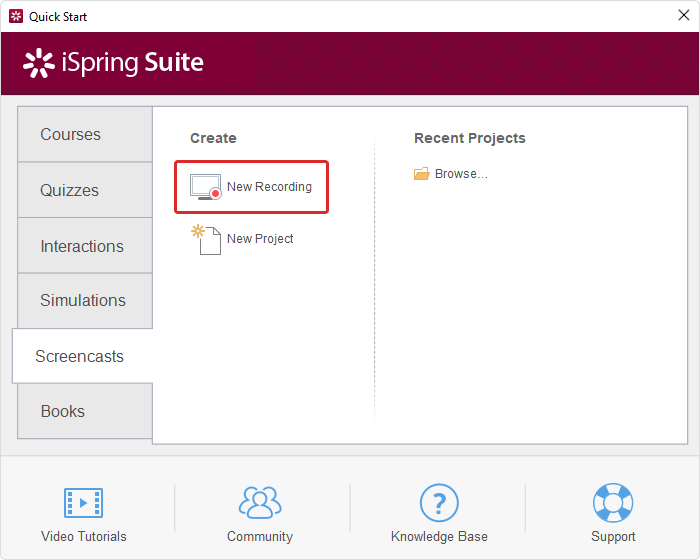
iSpring Suite will ask what you want to record: the screen, the camera, or both screen and camera simultaneously. Since we’re going to make a presenter-style video, we’ll guide you through the key steps on how to record using a webcam.
In the Recording Settings window, choose the Camera mode and customize the additional options.
- You can change the video size in the Preset drop-down menu.
- You can also choose the mic that will be used during recording on the Microphone menu. The mic is on by default, but you can turn it off by clicking on the speaker icon.
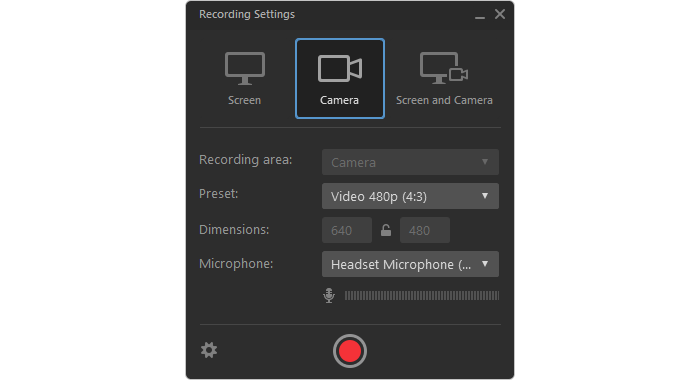
After you’re done with the webcam and microphone settings, click on the red button to perform a quick test.
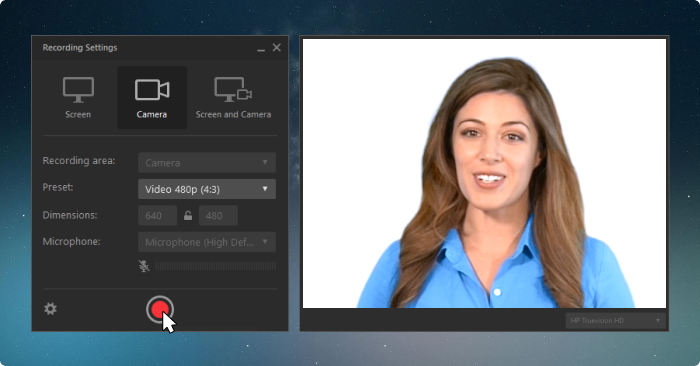
Record for a few seconds while talking. Then, click Stop or press F10 on your keyboard to finish the recording.
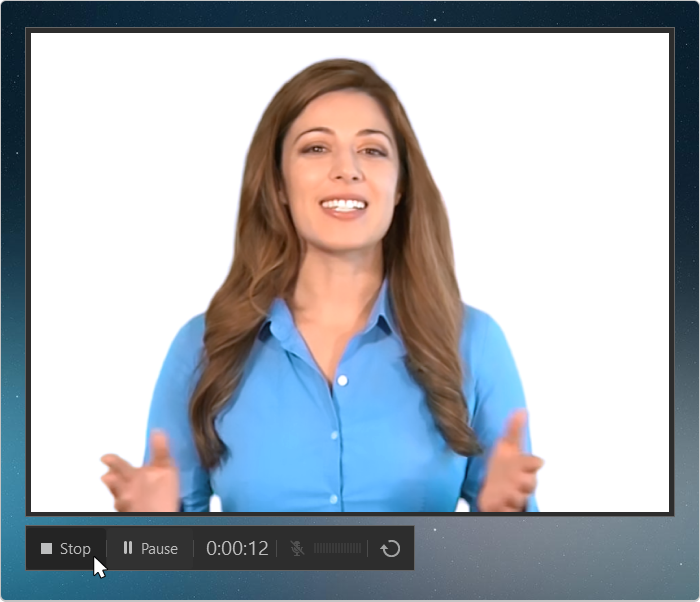
Play the video to check if the recording looks and sounds good.
Step 4. Record your training video
If everything works as intended, you can start recording your training video. Do a quick run-through of your script or talking points, adopt the appropriate posture, and click on the Capture button. Pause the recording as needed, and stop it when you’ve finished presenting.
Note: If you make a mistake, continue recording. Simply take a breath and start from the place where you stumbled. You’ll be able to cut out the mistakes later.
Step 5. Edit your training video
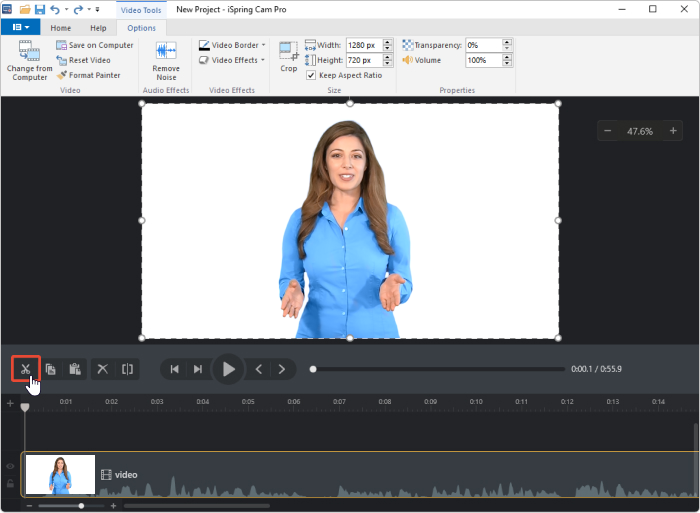
After you stop the recording, the video will open in the iSpring CamPro editor, where you can easily perform all the basic editing.
Start editing the video by trimming out the unwanted parts. Use the scissors icon to cut the fragments where you misspeak or cough out of the timeline.
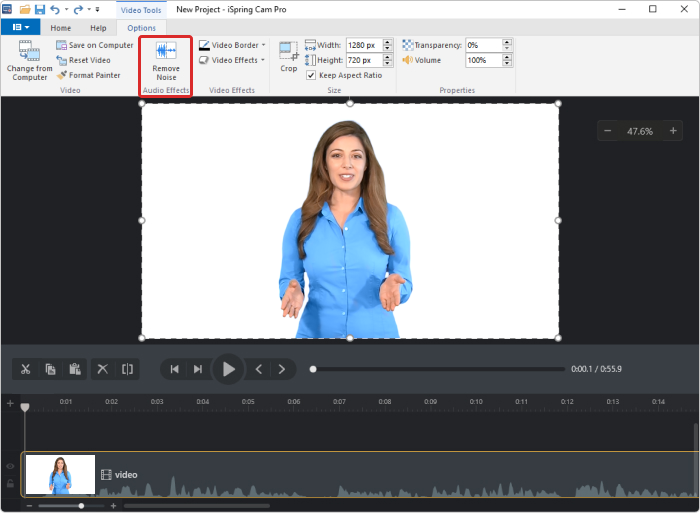
You can also remove background noise from the entire recording by hitting the Remove Noise button on the iSpring Cam Pro toolbar.
With an entirely cleaned-up timeline, you can move on to the fun part: adding other kinds of content. iSpring Suite allows you to insert pictures, infographics, animations, and text.
If you’re going to add pictures or other visuals to your training video or want a smoother segue from one shot to the next, you need to add transition effects. To apply a selected transition effect, drag and drop it on the clip in the timeline.
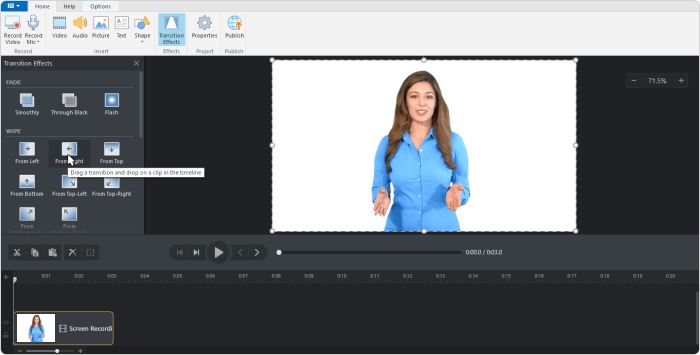
You can also enhance your training video by adding background music or just inserting it at the beginning and end of the video to engage your audience even more.
Once your video is ready, you can start training your employees. To make your video available for colleagues, upload it to YouTube, Vimeo, or your LMS. By using an LMS, you’ll be able to keep track of learners’ progress in remote learning.
Best practices for effective video editing
To streamline your video editing process and make the final interactive video training more polished, consider this advice from video experts.
Make sure you:
- Give reasonable descriptions. There’s nothing worse than trying to find a desired shot in a folder containing several hundred files named “Untitled File.”
- Focus on storytelling. Have a clear vision or end goal while editing; this will help you build a smooth script and deliver the message effectively.
- Review the next day. Save time for a fresh perspective upon reviewing the video. “Sleeping on” your work provides clarity and helps you see the video from the viewer’s standpoint.
Make sure to avoid these pitfalls:
- Overuse of transitions and sound effects. Resist the temptation to use jump cuts and sound effects excessively. Strive for a balanced approach, as too many effects can overwhelm the viewer.
- Use of copyrighted material. To determine if an image or other media is copyrighted, check for licensing information, look for watermarks, or consult the source website’s terms of use.
- Forget to save and back up. Be sure to save your work and make backups regularly. Set up automatic saving on your device and maintain backups on an external hard drive. This precaution ensures that your edits are secure, preventing the frustration of losing valuable changes in post-production.
Training Video Software
Preparation for recording is essential to making post-production smoother; proper editing tools will do the rest. That brings us to training video software. We’ve collected five all-in-one tools to facilitate the recording and editing process for all types of users.
iSpring Cam Pro
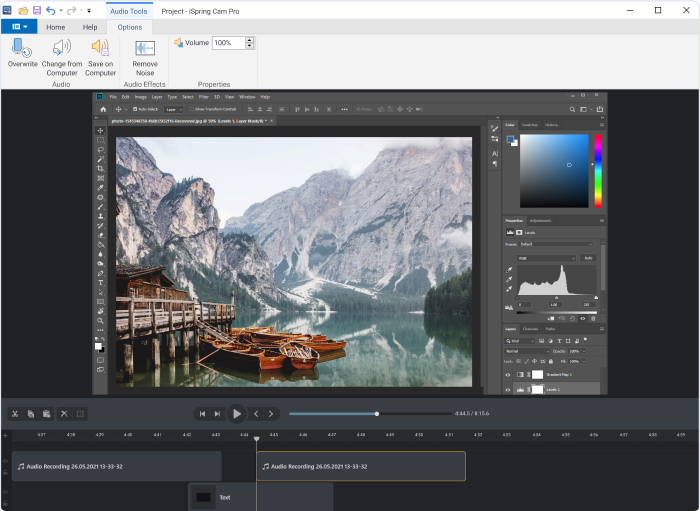
iSpring Cam Pro will be perfect for YouTube video tutorials. It’s a full-fledged studio that allows you to record any type of professional training video or software tutorial. You can change the speed, annotate, and edit training videos easily before uploading them to your LMS or your YouTube or Vimeo channel right from the software interface.
iSpring Suite
iSpring Suite is an authoring toolkit for creating online courses. If you want to engage your online learners not only with video but with interactive courses as well, this will be a perfect pick. The toolkit has capabilities equal to those of Cam Pro and includes great features for interactive course building. With iSpring Suite, you can make video tutorials with dialogue simulations, interactive activities, drag-and-drop quizzes, and more. Then you can save the courses as videos or other eLearning formats.

Check out this demo to see what an eLearning course in iSpring Suite looks like:
FilmoraX
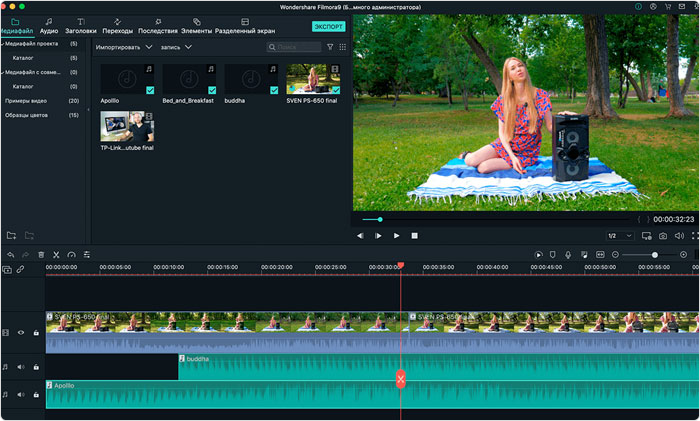
FilmoraX is a software that simplifies advanced video editing for novices. It enables you to manage narration speed, fix camera shakes, change backgrounds, and create custom animations, split-screen videos, stop-motions, and add other effects.
Camtasia
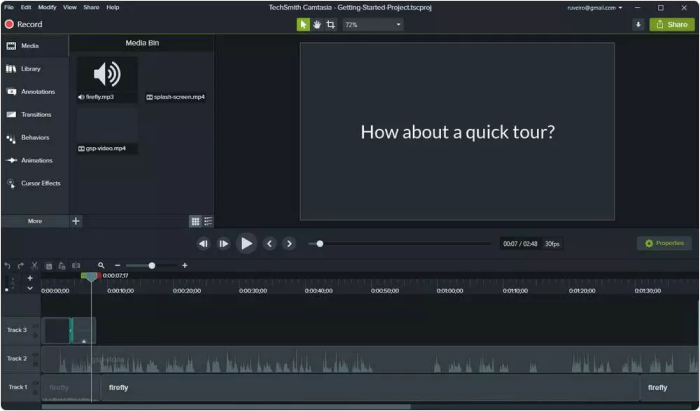
Camtasia is a smart choice for video screencasts and software demos. It’s a straightforward yet powerful screen recorder and video editor that also facilitates editing audio narration, adding sound effects, and including royalty-free music.
Hippo Video
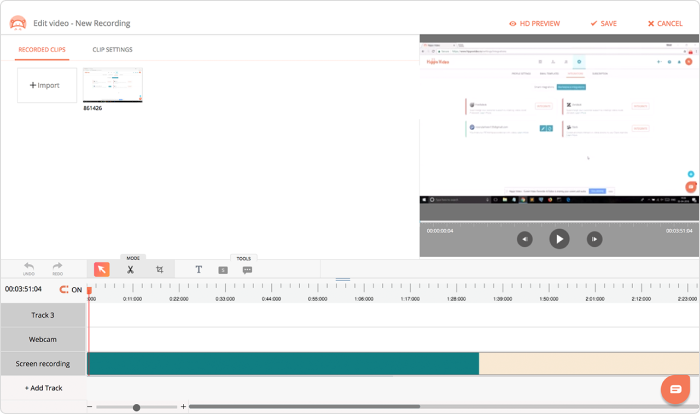
Hippo Video is a comprehensive tool that can record your video and audio in HD and place it anywhere on the Internet. It has a full set of helpful editing features like annotations, callouts, tags, and highlighted mouse clicks. Moreover, it excels in video reporting: you can learn who your viewers are, where and how they watch your video, and their preferences.
6 Tips for Making More Effective Training Videos
Would you like to make your training videos even more effective? Here are the top 6 tips we’ve compiled for you to get what you need.
Tip 1. Connect with your learners
If you want to achieve good training results, the first thing you need to do is connect with your learners on an emotional level. Effective communication (even if it’s one-way communication) begins with knowing your audience and speaking their language. So, before developing a training program, explore who your learners are — their average age, educational level, position, etc. Pay attention to how your employees speak, and then, while recording a video, copy their manners of speech and use their vocabulary.
The way you look on camera matters too. Your appearance, including clothing, should match the expectations your learners have of a person in your position. For example, the presenter needs to be dressed in scrubs if you’re recording a video for medical staff. And if you’re training factory employees, you’re probably going to choose a uniform.
The presenter’s overall image should be neat and not too distracting. Here are some things it’s best to avoid when presenting on camera:

Tip 2. Keep your videos short
People have very short attention spans, and you need to keep this in mind when creating training videos. Vidyard 2022 research reports that videos under 1 minute were watched by 62% of viewers compared to 20-minute videos that were finished only by 26% of viewers.
For example, La Sonanta used this tip when developing a training program to help people learn how to play a Flamenco guitar. Instead of recording long, exhausting videos, they made a series of lessons with close-ups to show how to keep your fingers on the guitar.
Tip 3. Use the Rule of Thirds
Whenever you’re recording a training video, remember the “Rule of Thirds.” Mentally divide your shot into nine equal parts using two horizontal lines and two vertical lines, like this:

This technique is used to draw the viewer’s attention to the main point of interest in the shot.
You need to align the key subject (in this case, the presenter) in the image according to this grid — at the ‘power points’ where the lines intersect. The lines on the 3×3 grid are the points where our eyes automatically fix. Placing the more important elements along this grid results in a more aesthetically pleasing shot and makes it easier for the eye to “read” the information.
Tip 4. Use a clean background
Nothing looks less professional than a messy or distracting background in a video. When choosing a shooting location, opt for a solid-colored background. It might be a wall, backdrop paper, or even a bedsheet. Make sure there’s no window or another reflective surface in the background. Otherwise, you can catch the camera in the reflection or make the presenter look dark and shadowy.
It’s also a good idea to record a training video in a “professional” environment, such as the place where you work. For example, if you’re going to train customer service agents, it’s sensible to shoot a video in your office. If the audience is car dealership staff, you may want to film right in the car service department.

Shooting a training video in a “professional” environment makes it look more credible for learners.
Tip 5. Add annotations
Annotations help attract viewers’ attention and keep them engaged. Here are some helpful insights into making annotations:
- Every training video should start with a title that tells the audience what you’re going to talk about and end with a closing graphic that ties the entire piece together.
- You can use subtitles for those who prefer to watch videos with the sound turned off.
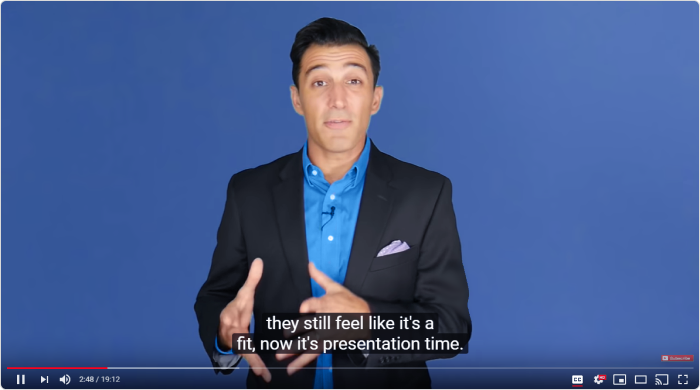
Subtitles can also help the viewer find specific places in a video without
having to watch it from the very beginning.
- You can add captions to highlight the main ideas when presenting; for example, outline the steps.

This simple trick will help learners memorize key messages more easily.
- You can use bullet points to list some rules, techniques, or other important points.
This will also help you focus the viewer’s attention on important information.

Bullet points are also good for recaps.
Tip 6. Combine training videos with other learning activities
Educators around the world encourage involving students in various learning activities because it helps keep them focused. This idea works not only for children, as you might think, but for adults as well.
You can make training much more engaging and, therefore, more effective if you combine video-based learning and training through online courses and quizzes, for example. Enhance the knowledge that your learners gained from your video lesson by delivering it in an eLearning course together with some additional information. Or perform a knowledge check after they’ve watched a video with the help of an online test or quiz.
To create courses and assessments, as well as training videos, you only need the iSpring Suite authoring toolkit.
How to Measure the Success of a Video Training
Once you’ve learned how to create a training video, it’s time to answer the burning question: Is the training any good?
The primary goal here is to determine if your employees have achieved the learning objectives. To measure the effectiveness of the training video, use evaluations, surveys, and training tracking tools.
You can use these 4 metrics to assess the video’s efficacy:
- Viewer engagement, such as view duration and click-through rates. Analyze engagement patterns to identify which parts of the video are most engaging and where viewers are dropping off. If you upload the training video to the learning management system (LMS), you can get more advanced analytics, such as learning how participants engage with supplementary materials, assessments, or discussion forums.
- Knowledge retention and comprehension. Here, you can use quantitative assessment such as quizzes or tests to evaluate participants’ understanding.
- Qualitative feedback. Encourage employees to provide comments and feedback or respond to surveys to gather qualitative insights.
- Behavioral changes. Observe changes in employees’ behavior or performance that can be directly attributed to the training content. Monitor key performance indicators (KPIs) that are relevant to the training objectives to assess the real-world impact.
By using these metrics together, organizations can gain a comprehensive understanding of how well their online training videos are performing and make smart decisions regarding future projects.
Discover effective methods for gauging the impact of your employee training.
Final Thoughts
We hope this article has provided you with some ideas on how to record a training video with no video production experience.
Videos don’t require much time to make, but will improve your employees’ learning experience. If you have questions about any of the points in this article, please let us know in the comment section.
